


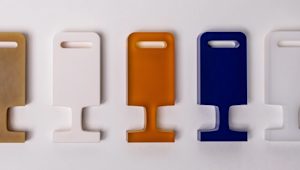
What materials have the best repeatability?
Seeking consistency and predictability in your parts? Check out our guide on repeatability, which highlights the materials that will perform the same way time and time again.
Read articleWhat are support structures in 3D printing? Depending on the technology you use to produce parts, you may need to print support structures to maintain part geometry. This article covers what support structures are in 3D printing, when they’re needed and how supports may affect the quality and price of your part.
3D printing builds parts layer by layer, so there always has to be a previous layer to build upon. Depending on the specific 3D printing technology and complexity of the 3D model, you may need to produce your part with support structures.
When deciding which 3D printing technology to use, it’s essential to consider support structures and how they affect the quality and price of your part. As well, support structures will have an impact on your part’s surface finish. Removing supports from a part often results in blemishes or surface roughness.
This article defines what support structures are for 3D printing, how they’re implemented for each technology and how using supports can affect your choice of manufacturing technology.
Fused deposition modeling (FDM) extrudes a metal filament onto a build surface along a predetermined path. As the material is extruded, it cools, forming a solid surface that provides the foundation for the next layer of material.
With FDM printing, each layer is printed as a set of heated filament threads which adhere to the threads below and around it. Each thread is printed slightly offset from its previous layer, allowing a model to be built up to angles of 45 degrees. This way, prints can expand beyond the width of preceding layers of filament.
When a feature is printed with an overhang beyond 45 degrees, it can sag enough to potentially ruin the print. This is when you need support structures.

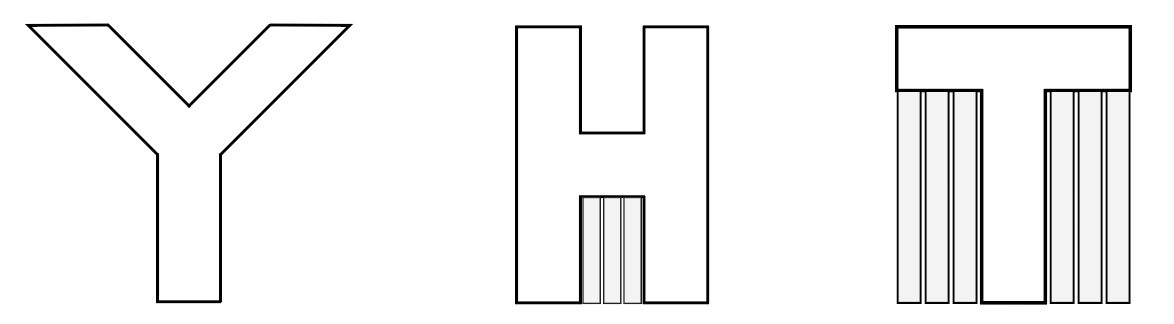
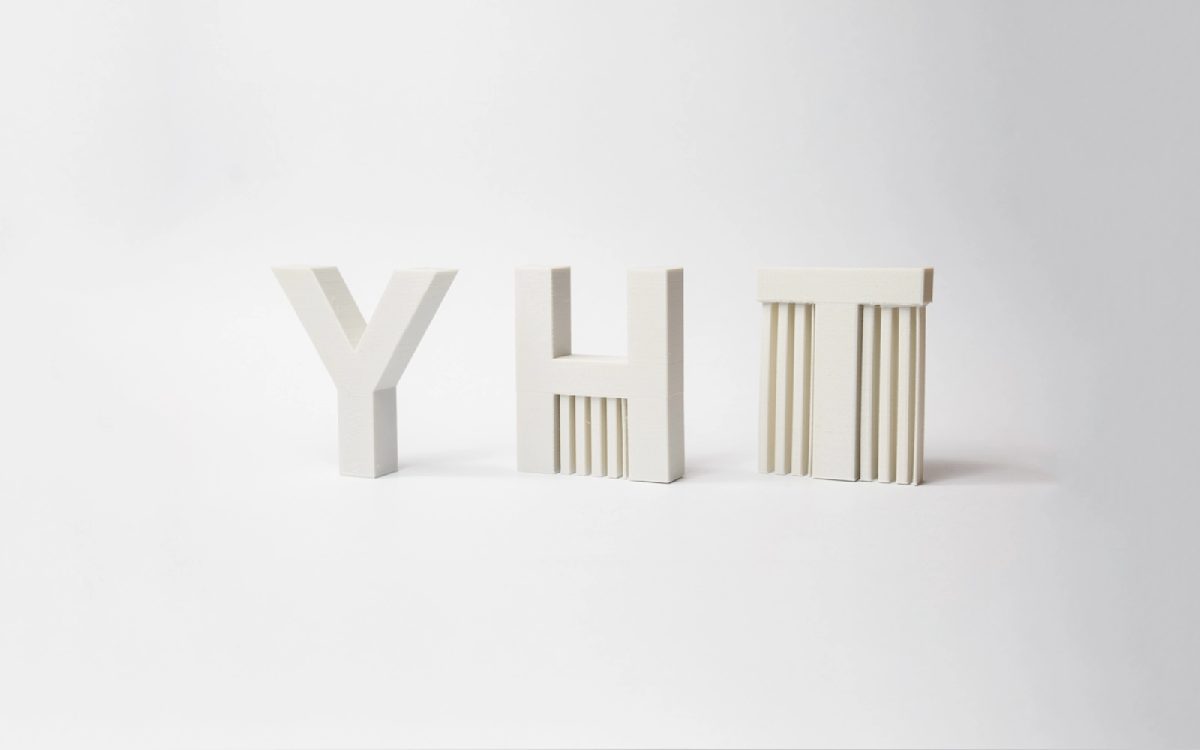
Let’s imagine you have to 3D print models of the letters Y, H and T.
An FDM printer can easily print the arms of the letter Y without requiring support structures. Even though these features are outstretched, they don’t extend past 45 degrees.
The letter H, on the other hand, is a bit more complicated. If the center bridge is under 5 mm, it can be printed without support or any sagging. Support is required if the bridge exceeds 5 mm. In the example shown here, the center bridge is over 5 mm, so it’s printed with support structures.
The letter T requires support for the top features extending from either side of the model. There is nothing for these out arms to be printed on and the material will fall down without supports.
The image below illustrates these three examples. The support material is shown in light gray.
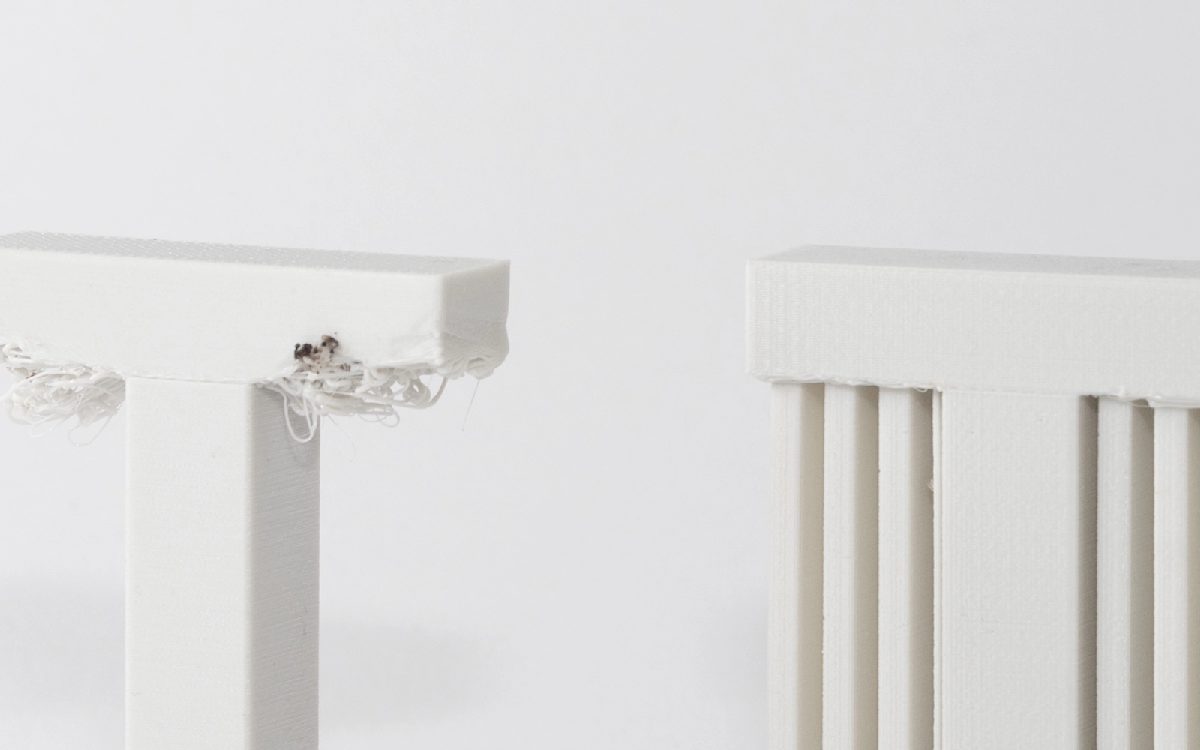
Here is how these models look when printed. The second image shows the result of the T printed without support. The surface has significant sagging and will require a lot of post-processing to clean up.
In some cases, there is an exception to this overhang rule.
Hot material can be stretched short distances between two points of a print. This method is known as bridging. Bridging allows parts to be printed without support materials and with minimal sagging. If a bridge is over 5 mm long, support structures are required if you’re hoping to achieve an accurate surface finish.
Curious about the price and material options for FDM?
The potential need to use support structures is one reason why FDM is not always the right technology for your application. One of the limitations of using supports in FDM printing is that post-processing is then required, which results in marks or damage to the surface in contact with the support materials.
Another issue is that layers printed on support structures will be less even because the supports won’t be stationary like solid layers of extruded filament. On top of this, supports can be difficult to remove from small, intricate features. This bit of post-processing could break your model.
Furthermore, having to print support structures adds to the cost of FDM. Supports require additional printing material that later needs to be removed, creating more work (and waste) for the operator. More materials and more human intervention equal higher costs.

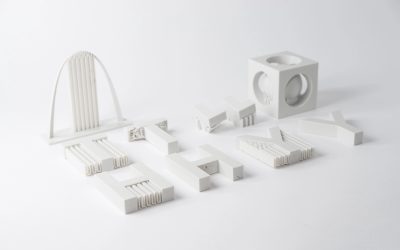
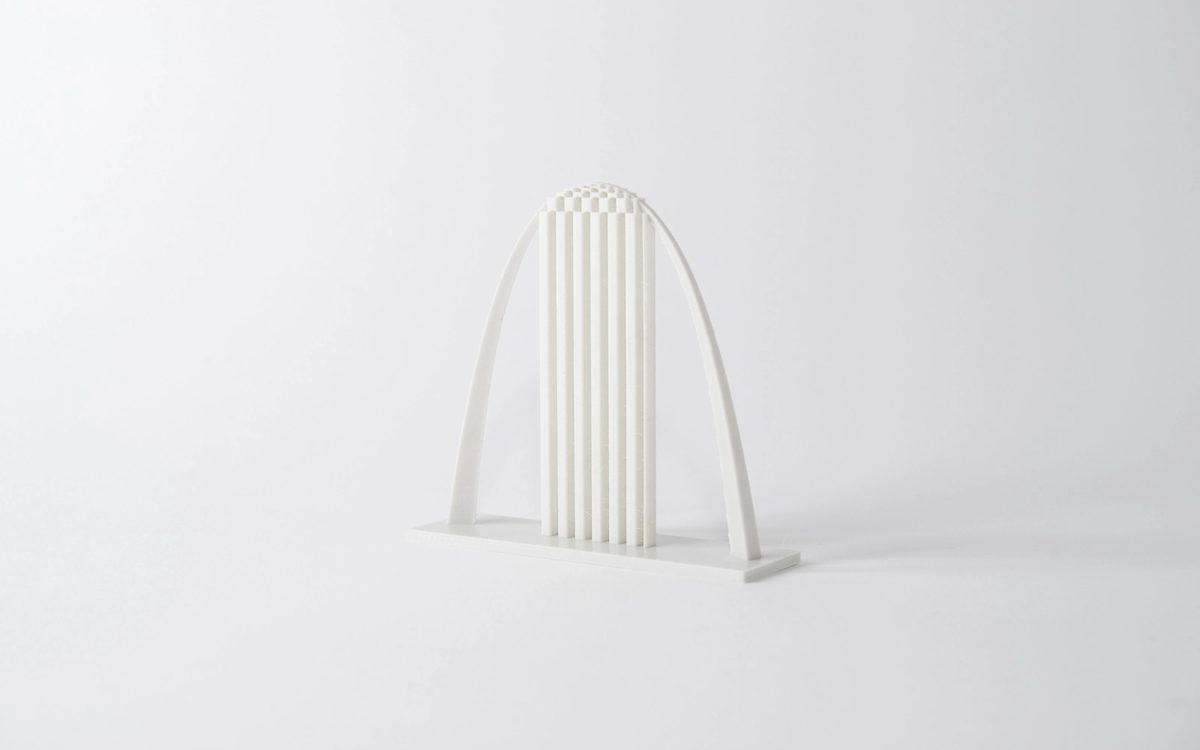
The amount of material you’ll need for support structures will ultimately depend on the design. If you’re printing a replica of the Gateway Arch in St. Louis, for instance (like the example below), you’ll only need a limited amount of support placed in the correct location to allow accurate printing.
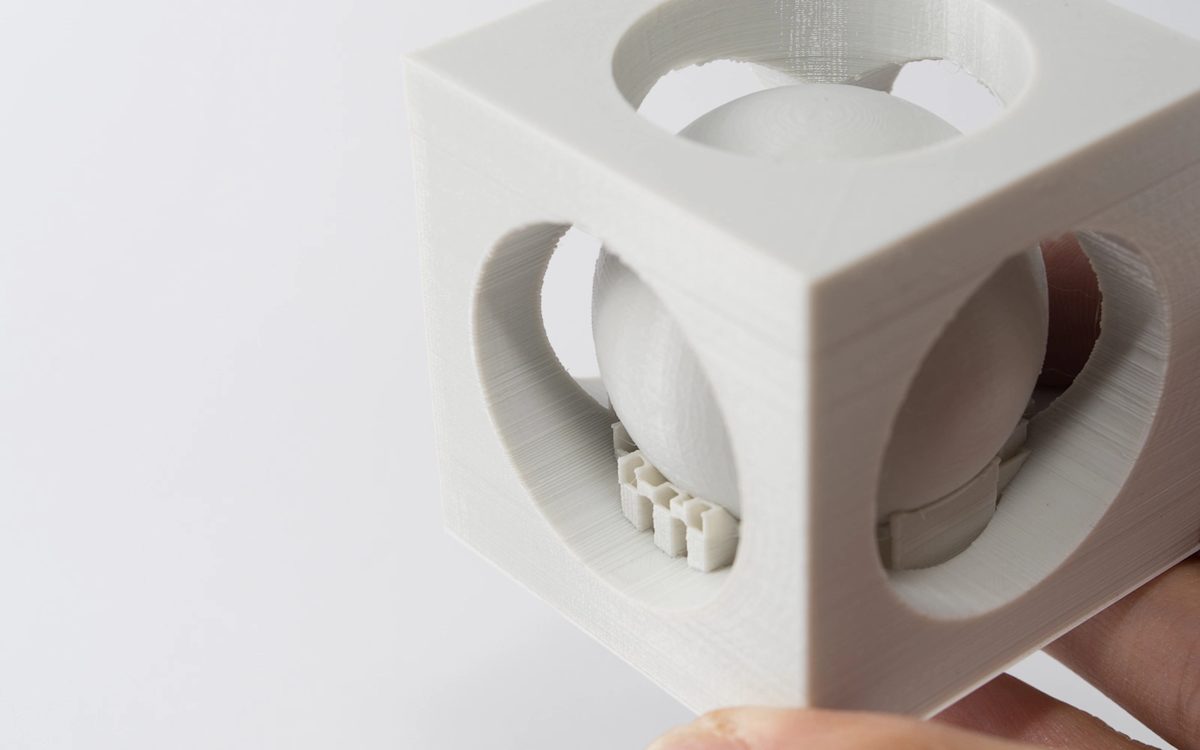
Now, if you’re printing a “ball in a cube” (shown below), you’ll need quite a lot of support material, which means a sizable amount of removal time as well.
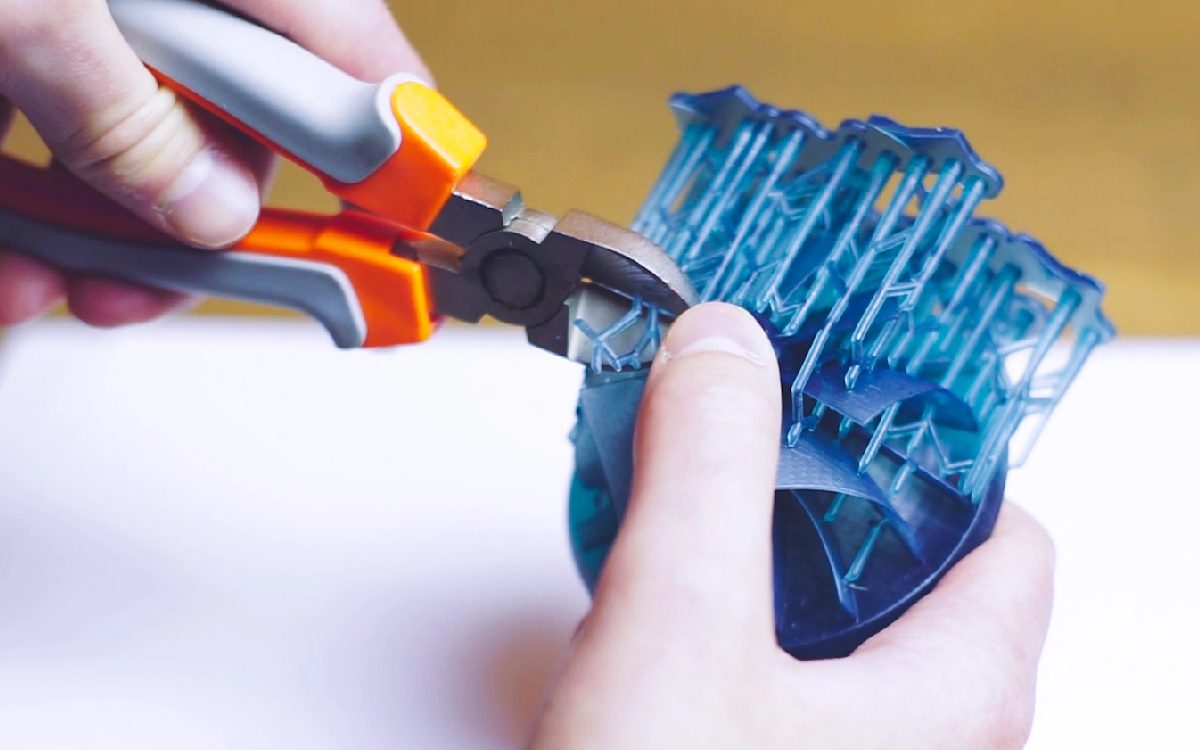
Removing the supports in this example is complex and involves getting rid of each support element with needle-nose pliers while attempting to limit the damage to the surfaces surrounding the supports. Sanding or smoothing these surfaces after support removal presents another difficulty.
However, without support materials, this model can’t be printed with FDM, unless you want to compromise on quality and accuracy. In this case—despite the added cost and print time—the additional support material used is essential to being able to print this design.
FDM 3D printing uses two types of support structures. The most common (and best suited for most FDM partS) is a sort of flat accordion or lattice structure. The other is “tree-like” support, which has less contact with the print surface and can leave you with better surface finishes after post-processing. Though it’s less common, the latter is much preferred by some operators.
The FDM printer operator will generally specify the type of support that best suits your application and minimizes the cosmetic impact it’ll have on your design.

Finely-tuned printers with two print heads can print support structures with a dissolvable material that doesn’t tear away from the part. Instead, you can dissolve this material in a chemical solution that won’t adversely affect the printed model.
This results in a better surface finish where the support is in contact with the main material, however, it can be expensive and time-consuming.
All industrial FDM machines are equipped to use dissolvable support materials. For instance, you have the Ultimaker 3, which can print PVA that dissolves quite easily post-print.
Stereolithography (SLA) and Digital Light Processing (DLP)create 3D printed objects from a liquid (photopolymer) resin by using a light source to solidify the liquid material.
Depending on the exact type of printer, you have two main methods of producing a model. Certain printers pull a model out of a vat that contains liquid material, solidifying it via a light source through a translucent window at the bottom (bottom-up). Others submerge the model into the liquid as the top layer is tread by a light source from the top (top-down).
To make sure that the prints adhere to the print platform and don’t float around in the vat, SLA and DLP printers almost always use supports.
Support structures from these printers look like thin ribs, with only small tips actually touching the model to save material and printing time. The number of supports, their location, where they touch the model and the structure are calculated by the software and are dependent on the shape, orientation and weight of the part being printed.
SLA and DLP are some of the most accurate technologies, capable of printing even the smallest and most intricate objects with accurate detail. With proper post-processing, printing with support does not impact the quality of the part.

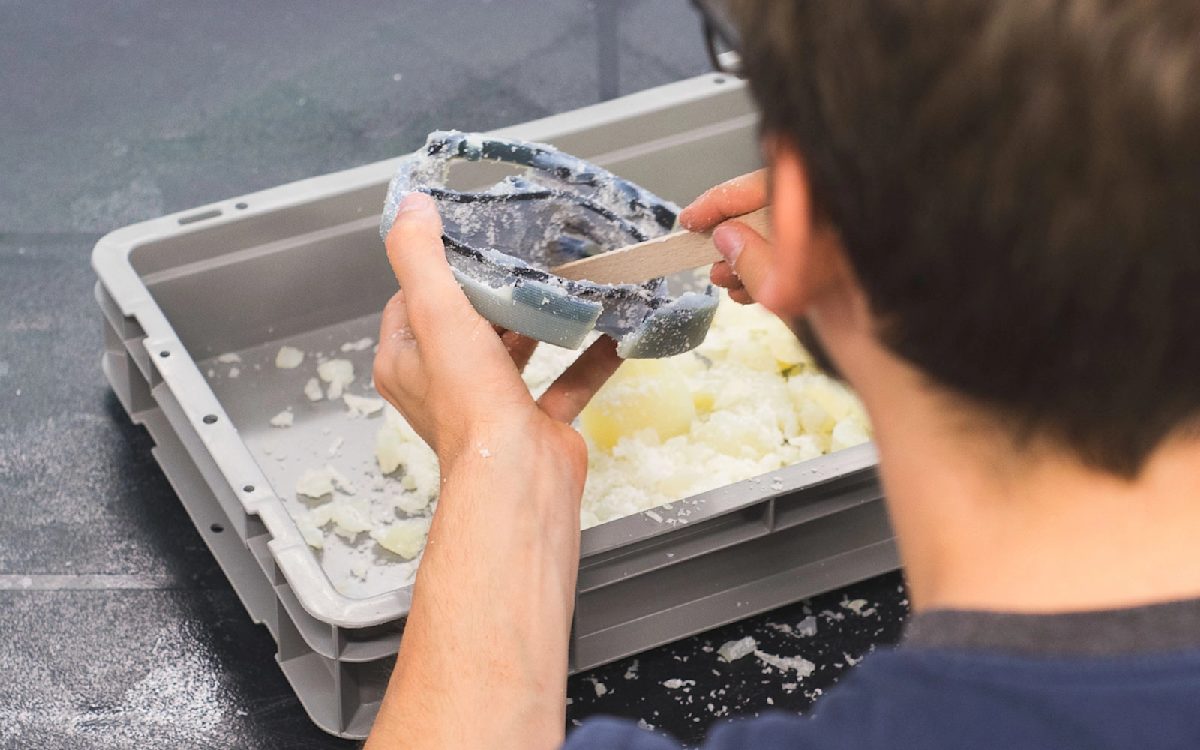
First, Isopropyl Alcohol (IPA) is used to wash liquid resin off your completed parts. Support structures can be either broken off the surface of the model or removed using pliers. The spots where the support was in contact with the object are then sanded to remove any remaining marks.
Curious about the cost and materials available for SLA/DLP?
Material Jetting (Stratasys PolyJet and 3D Systems MultiJet Modeling) technologies are similar to inkjet printing, but instead of jetting drops of ink onto paper, these 3D printers jet layers of liquid photopolymer onto a build tray and cure them instantly using UV light.
These printers require the use of support material in all cases where there are overhanging features, regardless of the angle. Supports are either water-soluble or are removed during post-processing using plyers, water jetting, ultrasonic baths and sandblasting.
Unlike FDM, supports for these technologies are in no way detrimental to a part’s cosmetic appearance, surface quality or technical properties. After proper post-processing, it’s practically impossible to distinguish where support materials were removed from your part.
Post-processing for material jetting involves power tools like waterjets and sandblasters, and using these tools may damage or bend the more intricate features of your model. We recommend that you follow our Material Jetting rules to avoid these sorts of issues. In fact, you may want to opt to print your parts using SLS if your model has intricate features and thin wires.
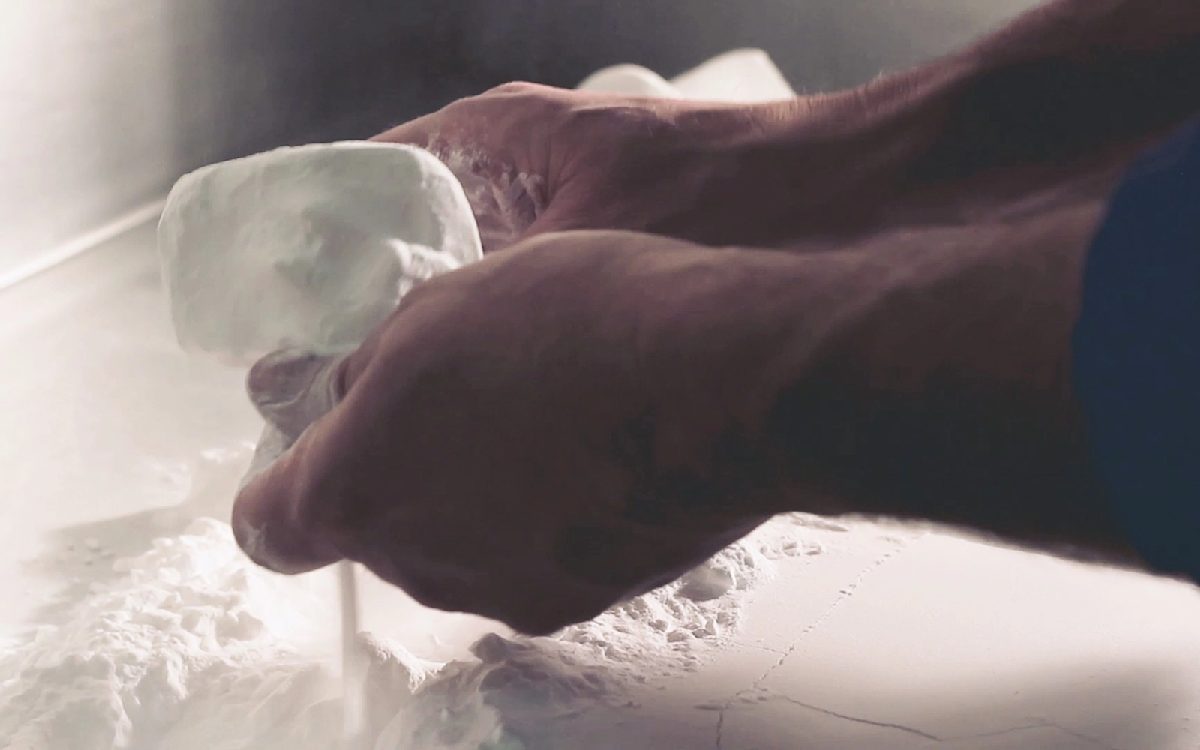
Selective Laser Sintering (SLS) 3D printers fuse powdered material in a chamber using a laser.
For SLS, there’s no need for support structures since the powder acts as a form of support when the object is built up layer by layer. This gives a lot of design freedom but also generally increases the cost and time to print a part. SLS requires time for the build chamber to cool down and cleaning the print requires a multi-step finishing process, including removing unfused powder, typically with an air gun.
Curious about the cost and materials available for SLS?
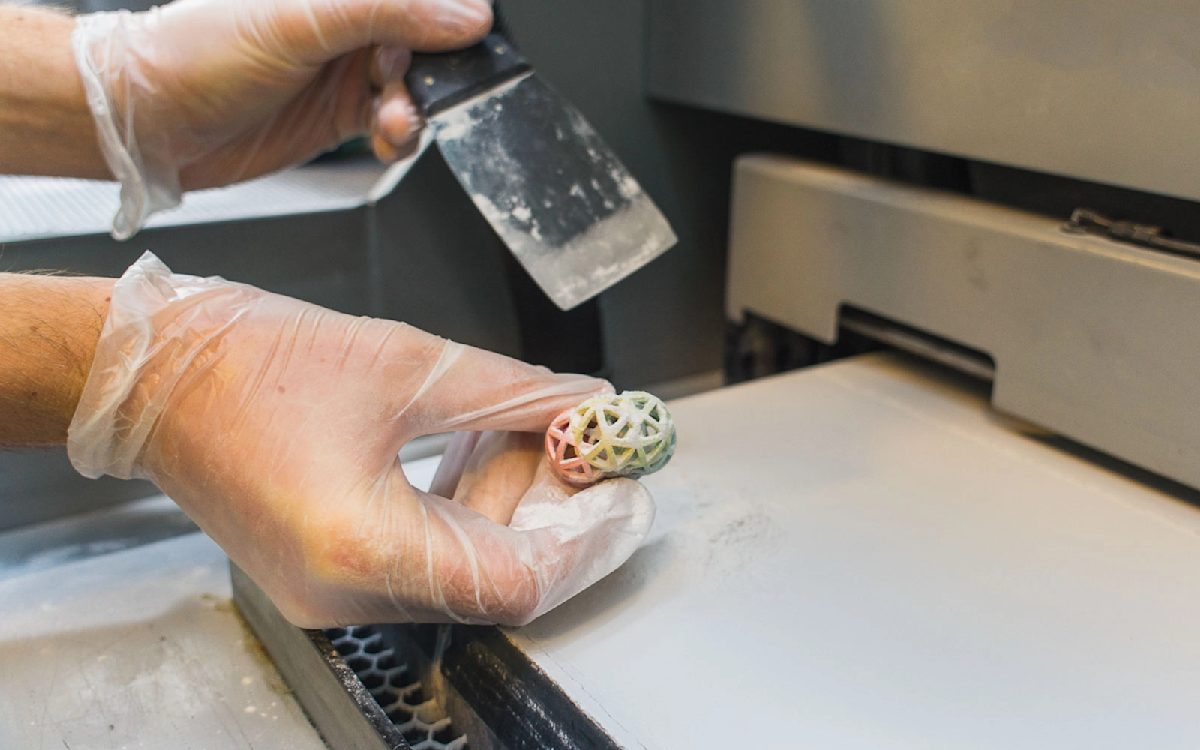
Binder jetting is similar to SLS in that the printer uses thin layers of powdered material to build up an object. Instead of using a laser to sinter layers together, however, binder jetting printers use a binding agent extruded from a nozzle to bind the powder together.
Similar to SLS, there’s no need for support structures with binder jetting since the powder supports the object as it’s built. As well, you have to clean and post-processing the print over several steps, including removing unfused powder with an air gun or another tool.
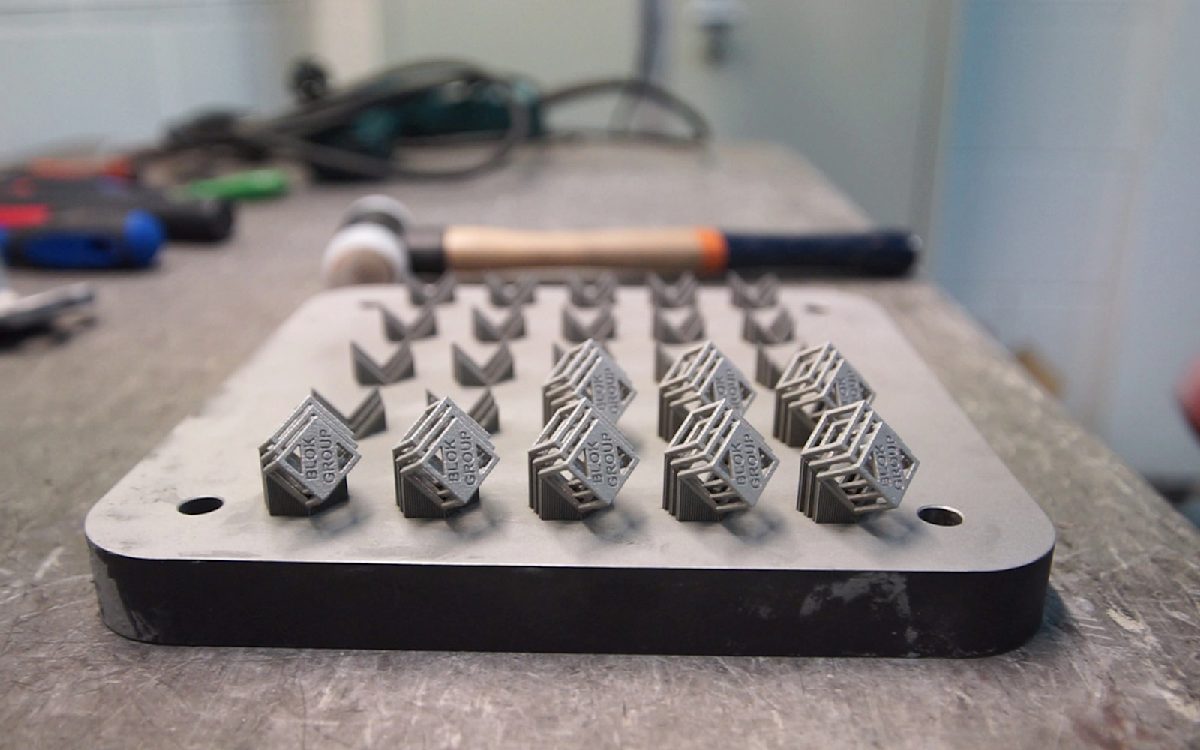
Metal 3D printing technologies use support structures to keep models fixed to a base plate during the building process. However, overhangs with an angle greater than 35 degrees can be printed without support.
When you do need supports for metal 3D printing, it’s important to ensure that they are easy to access, or else it’ll be challenging and maybe even infeasible to remove them during post-processing.
Using supports won’t impact the overall quality of your part, and with the proper post-processing methods, you can remove all marks from the printed model.
Whether or not you need to use support materials for your specific application, it’s important to know the best practices for this aspect of the 3D printing process.
Support structures will generally affect the cosmetic appearance of a part, so you’ll need to rely on post-processing to improve the surface finish after removing supports. Material Jetting is the exception to this rule.
The more support structures you print, the more complex a design can be for certain 3D printing technologies. You can optimize the amount of support material you use by addressing part orientation and part accuracy (among other design and manufacturing factors) to lower the cost and print time.
At the end of the day, this is the most essential question. The table below summarizes whether support is required for each of the 3D printing technologies we offer at Protolabs Network.
| 3D printing technology | Do I need support structures? |
|---|---|
| FDM (desktop & industrial) | Depends on model geometry |
| SLA & DLP | Always |
| Material Jetting | Always (dissolvable) |
| SLS & MJF | Never |
| Binder Jetting | Never |
| Metal 3D printing | Always |
If your part has overhangs and bridges (and you’re printing with FDM or similar technology), then you likely need support structures. We recommend using technologies that don’t require them or opting for dissolvable support materials.
SLS, MJF and binder jetting 3D printing never require support structures, so these are the preferred methods for more complex geometries.
The most common (and most popular) types of support structures in 3D printing are called lattice supports. They work well for nearly all kinds of 3D models and are quite easy to create and customize. Their only drawback is that they can be tricky to remove and may leave marks on your part.
Supports will generally add to the cost of your final part, as they require additional print time and materials. On top of this, most supports aren’t reusable and go right into the waste bin. While the exact costs will vary based on the size of the part, the materials you’re printing with and what technology you’re using, the short answer is that supports will always make your manufacturing project more expensive.
Seeking consistency and predictability in your parts? Check out our guide on repeatability, which highlights the materials that will perform the same way time and time again.
Read article
How can you create a part or product that’s ready to move from prototype to production? Check out our article, which offers tips and tricks for designing with scalability in mind.
Read article
Learn what to consider when making a choice between 3D printing and injection molding, the benefits of each manufacturing method, and more.
Read article
Learn about the advantages and disadvantages of various methods of industrial 3D printing, materials that are commonly used, and more
Read article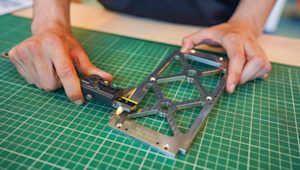
What is Geometric Dimensioning and Tolerancing (GD&T) and how is it used? This article explores the basics of how and when to use GD&T to get the best results out of custom part manufacturing.
Read article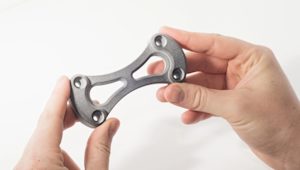
Multi Jet Fusion (MJF) 3D printing can create highly accurate, complex industrial parts more efficiently - and potentially more cost-effectively - than other industrial 3D printing processes. This article covers how to design parts for MJF, common applications of the technology and key best practices.
Read article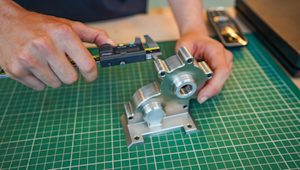
Design for manufacturing (DFM) means taking a design-first approach to manufacturing. In this article, we look at the overall DFM process, the necessary steps for a successful outcome, examples of DFM done right and how to get the most out of your own processes.
Read article
Multi Jet Fusion (MJF) is a 3D printing process for building prototyping and end-use parts fast. This article explains how MJF works and its main advantages.
Read article
Rapid prototyping uses 3D computer-aided design (CAD) and manufacturing processes to quickly develop 3D parts or assemblies for research and development and/or product testing.
Read article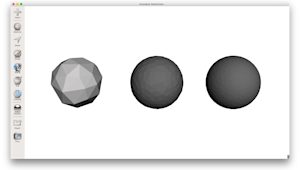
Learn how to avoid low quality 3D prints or unnecessarily large files by exporting your STL file in the correct resolution.
Read article
What are the different materials available for SLA 3D printing? This article compares the main printing resins, including standard, tough, durable, heat resistant, rubber-like, dental and castable, by material properties. Find the best material option for your application.
Read article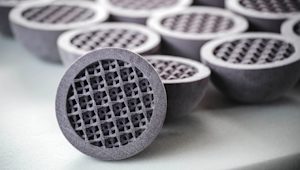
A comprehensive guide on designing parts for Binder Jetting, covering the printing process, design specifications and material options.
Read article