Hi there everyone! I recently completed my first hand as a part of 3D Hubs’ partnering with E-Nable to print the newly revised Experiment v5 hand.

^ This hand is actually going to a training workshop to teach people how to assemble the hands and then will be donated to charity. I’ll divide this post in to three major parts. The print, the process, and my take away.

The print popped up in my 3Dhubs ordering feed last week for one of my printers. At first glance, I actually didn’t realize this was one of the opt-in for charity hands. Several of the parts had an error “Part may be too small to have accurately calculated cost.” and were all listed at $0.00 (or rather, 0.00cm^3) Also, there were quite a few duplicate parts and “extra” parts. The requested print contained palms for both the left and right hand, but only one wrist support. It also only contained enough pins for one hand.

The e-nable hand is a relatively complex design. To ensure there is a proper checklist for all needed parts, requestors should upload a blueprint like so. http://c.searspartsdirect.com/lis_png/PLDM/50034474-00001.png

The file names themselves actually had the naming convention “Part_leftorright_quantity.stl” This was great, except was horribly inaccurate. For instance, it only called for one knuckle pin when 4 are needed. I had to base what parts were needed on previous revisions as I could not download the v5 source from anywhere. The uploaded parts were also missing the supported version of the left palm and I had to mirror the right-palm.

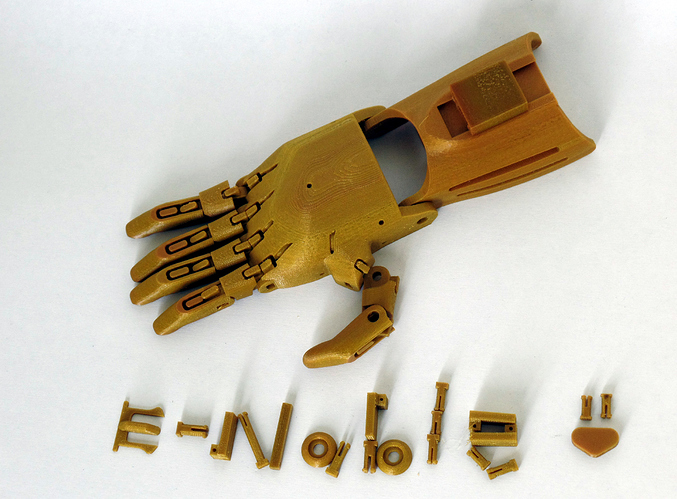
All of the parts pictured were printed with:

TL;DR? There needs to be a better parts list, and a schematic of all the needed parts. Less experienced hubs are going to miss a few parts with such a large print-job request. E-nable should present the parts pre-plated to simplify.

One great thing about printing the e-nable hands is the baked-in support lattice. There’s even a “support test piece” included for you to ensure your printer can print the single-wall support without issue. Where this may become a problem, is when the print gets scaled up as mine was.

The hand I printed was requested to be scaled to 135% size. This being an option that 3D hubs should be able to facilitate. With an increase in scale, often comes sloppier tolerances and you guessed it, bigger walls. The support walls for right palm caused the print to fail twice for me. Unfortunately, if a printer hits resonant frequency infilling a .5mm wide gap, things get messy. I had to manually scale the support structure in X and Z ignoring Y (to prevent the problematic double-wall from occurring.) E-Nable should provide several 1wall thickness support latices for different scaled hands. In 5% increments from 50% to 150% should be sufficient. This would prevent other users from having problems.

The process itself, I already touched on a tad. It was somewhat jarring to see what a print I’d normally charge ~$100 for come in to a whopping $0.00 in my hub. I spent around 20 minutes fiddling with all the parts in my slicer before realizing that this was a for-charity print. 3D hubs needs to have a clear notification (like a blue ribbon or badge) that shows this is a probono print. In fact, that would be a cool thing to have on my hub after completing such a print.

The person ordering the print did not have much experience with 3D printing or the technology required. They were also sometimes sluggish to respond to the needs for the printed part (see parts list being wonky) What I did find out is that they had several other local hubs printing extra pins and smaller parts. My hub was used to print this part mainly because the other hubs had issues printing the palms and gauntlets.

Otherwise, the process was just like any normal customer print. It took a little longer than I’d have liked totaling in at 14 hours of print time stretched over a week so I could supervise. A total of ~17 hours if including the time I took to reorient the parts, plate them, clean off burrs, and package them.

I absolutely love the fact that I am providing a training aid and ultimately a hand. A freaking hand. From my humble desk, I am giving someone something I take for granted every day. No, its not the absolute most flexible hand, but it’s good enough to tie shoes! I hope to continue on with the 3Dhubs charity project, and most importantly, helping people. AMaA!

18 Likes

Love this, great work alotmeter and thank you for helping with this. Due to your hard work and others like you we are now looking to expand this to other countries and areas creating a global network of Hubs changing peoples lives for the better.

1 Like

Great job! For more clarification on the hand assembly and build, check the enable site there are specific parts listing and instructions on how to print and assemble each hand. Here is a link to an instructable that walks you through everything as well, http://m.instructables.com/id/Assembly-of-e-NABLEs-Raptor-Reloaded-Hand/.

1 Like

Yeah, that’s what I ended up using. However, as noted: The hand pictured is the new v5. It has a few minor differences.

Our makerspace, Maker Depot, also just finished printing our first e-Nable hand for charity. I will voice the same issues that the Nathanial had with the process. I had printed 2 of these prior to this for a reduced fee, so I did have some experience with them.

It was a little confusing as to what to print, but after going through the models, I was able to determine that there was a left and right hand and one without support. I printed both the left and right hand just in case.

I didn’t have any failed prints, and utilized two of our printers to get them done in 2 days.

LulzBot Taz4

Ultimaker 2

I printed only a few objects at a time on each, just in case they got whacked. I used the same settings as Nathanial for the slicing of the job.

The only thing that I have a “small” complaint regarding is that this was to be shipped out, which was a $12 cost out of my pocket. Again, since it was for charity, I was fine, but going forward I think that these types of prints need to be pickup only.

Michael

Maker Depot

2 Likes

I used usps. $6 shipping. Tacked that cost on to the order and they happily payed it.

Hi Michael (Muckychris here - LOVE the Maker Depot!!!)
Anyhow - I’m printing one now for 3D Hubs Charity. I did put $5 as a shipping cost and it was paid promptly.

1 Like

This group is awesome. Just delivered a hand last week. I reccomend contacting Enable to go through their matching service. www.enablingthefuture.org They have lists of recipients based on location. They provide contact info and file photos of the person you will be helping. It was a fun and rewarding experience.

http://www.wilx.com/home/headlines/Local-Boy-Gets-3D-Printed-Hand-333740881.html?device=phone&c=y

1 Like

So great to see Hubs taking part of the E-nable movement!

1 Like

Our hub recently printed 16 of the raptor reloaded in 100%, 120%, 124%, 130% and 140%. For the tensioning screws and pins we used m3x20(100% only), m4x20, or m5x20 (140% only) screws being sure to predrill and tap them, appropriately. For the Palm Velcro we used m5x8mm or m3x8mm (100% only) button screws depending on the scale. We followed Andreas bastians excellent instructable for the raptor reloaded. See more about it at http://Hedron.technology/adoptahand

1 Like

Very nice!

I’m based in Sydney and would be happy to print these as donations.

3 Likes

Nice! Hear that @54321qwer?

Hi, thanks for the offering to help. We are currently in talks with e-NABLE on the best way to move forward. Thanks again.

Hey Altometer,

I volunteer for eNable and was discussing your experience with my fellow eNable volunteers in the lab, and they pointed me in the direction to this forum:

http://forums.enablingthefuture.org/viewtopic.php?f=18&t=171

The hand that you printed is still in beta testing, and is being developed by Jason Bryant. If you could please share your experience again on that forum it would be a huge help to the developers. You provide some good insights and I am sure they would like to hear them. I will post a link to this discussion there as well to try and help funnel some discourse between these two groups.

I also urge everyone else to share their experiences with printing and assembling hands on the eNabling-the-future forums. This is all valuable product testing that is directly beneficial and is for a great cause!

Thank you,

Zach

I realise a lot of people are now getting involved with these kinds of projects, but I’m keen to hear from the recipients of the hands. I’d like to do some research into their benefits and how they improve lives (if they do…?). Has anyone had much feedback from their hand recipients?

thanks!