Hi All,
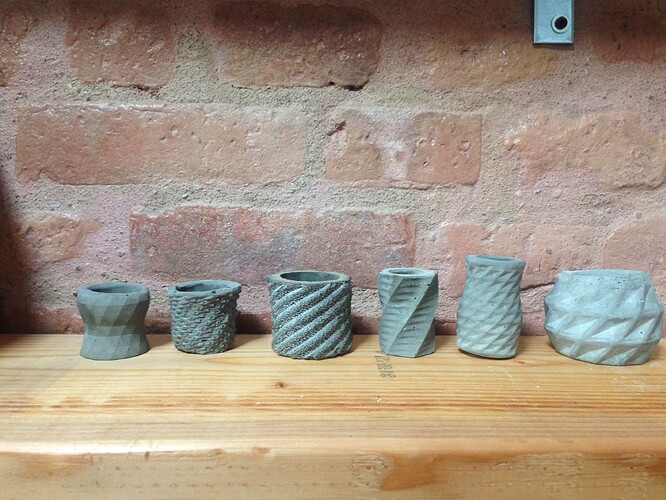
I’ve recently been experimenting with some casting of 3D printed parts and I thought I’d share the results. Below is a picture of my first batch of concrete vases from 3D printed designs.
For the designs, I utilized Autodesk’s beta product Shapeshifter. It’s essentially a controlled generative design software. No design skills required, just a lot of button clicking until you see a design that’s interesting :). Adding design complexity is getting easier and easier.
For the mold, I used a Smooth-On Silicone rubber, which is readily available at any art and hobby store. Its cheaper to buy larger quantities online, but for initial testing purposes the 1 quart “sample kits” at the art store I went to was more than enough. Wear gloves when handling, this material is reactive and is a skin irritant if it gets on you. It’s also very messy. Be sure to mix Part A and B thoroughly with a mixing stick otherwise it won’t cure properly - it should be a purpleish color at the end.
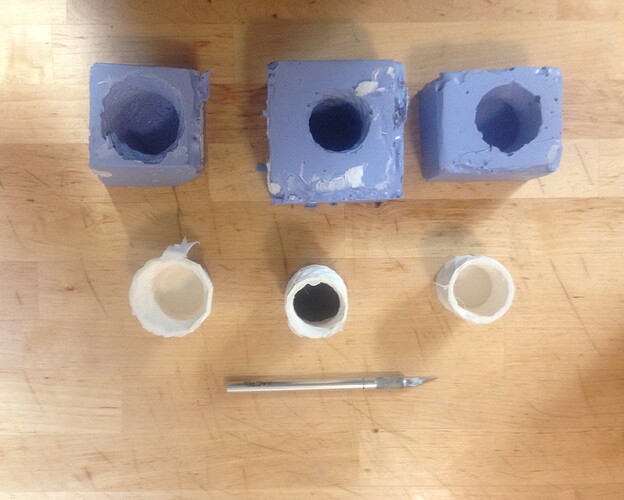
For prepping the Mold, first you need a watertight mold box. I used an exacto knife, foamboard, and a hot glue gun to make mine. A cut up water bottle or something similar can also work. Once that’s ready, hot glue or superglue the master part print top down to the base of the box. I filled the box with water to test for water tightness and also to get the right quantity of liquid to use, you don’t want to waste the Silicone. After water, spray Mold Release on the print to make sure it can be removed relatively easy. Next comes pouring the material.
Do a high pour after letting the mixed material sit for a few minutes (not very long though, otherwise it will start curing!). The goal of a high pour is to limit air getting into the mold. Once poured, give the mold box a few taps to try and get additional air bubbles out of the mold. If you happen to have access to a vacuform to remove air bubbles from the mold, now’s the time to use it! Let cure for ~6 hours (depends on mold material).
To remove the master print after curing, sometimes an exacto knife is necessary to cut some of the rubber. This part can be surprisingly tricky. To key here is to cut along the side in a jagged pattern. This way, when putting a master mold back together the two parts key back together. If this is necessary for your print, rubberbands work well to keep the master mold together when casting.
For the casting material, I used Duracal gypsum cement. Other cements will work as well, but for the casting to maintain high detail it should be a very fine powder without extra additives. Quikrete Countertop Mix also works, but i had a hard time finding this at my local Home Depot. For me, It was easier to order the Duracal cement online. Mix the cement powder with water and keep it relatively runny to make it easier to pour. Spray the Mold with Mold Release spray before pouring. After pouring, tap the mold again to remove air bubbles. The cure time for Duracal is fairly quick at about 1-2hours.
That’s about it! My first batch wasn’t perfect, but I’m fairly happy with the results and was surprised at how much detail the casts maintained. You can clean up the casted result by using an exacto knife and or sanding paper. Let me know if you have any questions or tips to share.