Hello Guys and Gals
I’ve recently been looking into a larger format 3d printer and came across the Formbot T Rex 2. Has anyone used one? I need a printer with at least 400X400X400 mm build volume to do some of the items I need. I don’t really need dual extruders but I would like the ability to print using some of the non conventional filaments (carbon fiber, copper, flex, etc). I would like to try and stay below $2,000 if possible.
I was spoiled in college years ago as I had an awesome professor that helped push my design skills and got to use the high end Stratasis machines in the lab. She also gave me the chance to go to SIGGRAPH and help run the 3d printer lab for the week. I’ve been subbing out all of printing since then to shapeways and what I’ve paid for the labor charges alone could have bought a decent printer.
If anyone has any opinions or thoughts please help me out. I haven’t been able to fins much info on this brand or had much luck sorting out the differences between the dozens of other larger printers. Thanks!
1 Like
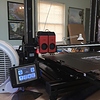
Hi, I just recently purchased the Formbot T. rex 2 printer myself. I purchaed it because of the large build size 16"x16". Also the wide range of temperatures up to 260 degrees C. It is of Chinese manufacture, and purchased as a kit, it needs to be assembled. It uses an Arduino Mega microprocessor for control. I can tell you my experience with it thus far. The machine came with some instructions on the SD card for assembly and setup. They are not bad. Someone put them together with photos and broken English but they are OK. At first I had a problem I, couldn’t get the table to move in the Y direction. It wound up the flat cable to the bed stepper motor was not connected well. Then the instructions were not clear about how to hook up the electronics fan motor. Early on I hooked it up backwards and it fried the motor. I didn’t realize it’s importance and I thought just leaving the cover off might allow enough cooling. My prints started slipping and I had to replace the fan. I think this did more damage than I realized. It printed some very nice prints, but then they started slipping again. Finally the y axis stepper motor driver failed. I must say formbot was very helpful to help me troubleshoot and fix all of these problems. Skype sessions from WV to Hong Kong were kind of odd but very helpful. I’m still anxiously waiting for another good print job to work out after all the repairs. Parts have been easy to find and not real expensive. Formbot has been reluctant to ship fro China saying it takes too long. I haven’t argued with them since my mistake caused the damage. Largely the problem was my unfamiliarity. But also not very good instructions. I am an engineer 30 years experience and not unfamiliar with such things, but 3D printing is new to me. Also while there was adequate assembly instruction, they provided no user manual. Nothing to tell you how to print, what temperatures are preferred, what maintenance to perform. All in all I think good English instructions are needed
1 Like
WooW22
3
Hey frank_66 I was wondering if you have 3d printed anything for the formbot trex2 yet? I have had this machine since April and to my surprise they came out with a new version. Story of my life… any who was wondering if you had made anything for like the cable that hangs down in the back. Was thinking about designing something for a better fan and a better mount for the cable. I to have went through a fan for electrical unit. I have also went through a x axis belt and the heat bed glass protector. I have been getting some good prints though. after 20 test cubes. its definitely a learning experience.
Hi, so I have made a lot of fixes to the machine. Early on, I broke the glass bed. I replaced it with tempered glass. That it sagged in the middle. I replaced it again with borosilicate glass. I changed the supports to aluminum blocks and I hold the glass down with spring clips. I added an aluminum block in the middle to help support and keep the glass from sagging. T. I changed the x axis belt to the white steel re-I forced belt. I’ve had to change the axis driver chips a couple of times now, my prints started slipping. I upgraded the software so I could use the auto-level routine and I have the software set up for a 9 point auto level. One other thing I did was calibrate the extrusion rate. Funny you ask about the ribbon cable support because my ribbon cable just failed and I was working on a design for a new support. Need to get the printer back operational before I can make it to see how it does. All that being said, I love the machine! I use it constantly. There is a steep learning curve but after you learn how to get it good and level and adjust the nozzle height correctly, it does great. The only problem I have is no matter how fine I print , I cannot get the lines out. I am told a good print will not show any lines at all.
1 Like
WooW22
5
what slicer program are you using? Here is a trouble shooting guid with great detail Print Quality Guide | Simplify3D Software I found when I changed my filament it happens a lot. I like using Hatchbox. It can because of filament or your temp is off. I too love this machine. I have friends that cant make big prints and complain about cutting stuff in half and have to glue everything. Now most just come over and ask to print on mine. I have found that the ribbon cable is pinching when i first start small prints. Its clearly a dumb design. So Ive been looking into changing it and upgrading the blower cooling fan. With out sacrificing the second extruder.
Hi again Woow22,
Yes I usually just use Cura as my slicer program. I had some help getting the parameters set up, and I’m kind of afraid to change now. I can also print from Pronteface, but I am familiar with Cura. Maybe that blower fan is the reason I keep having problems with my axis drivers. I wonder if adding a second fan would be the thing to do? I have been blowing a small house fan on the control box in addition to the fan that comes on the box. Yes I like having the large format printer, but I find the larger the print the harder to get a good result. Bed has to be very level, nozzle height has to be just right to get the print to hold down. temperature has to be just right because the larger prints tend to hold heat and sometimes start to curl up. It’s all big fun though. I print mostly in HO scale and my prints border between the normal size bed and the large format. Thing with large prints is sometimes you don’t find until 20 hours into the print that something is going wrong!
WooW22
7
You should try simplyfi3d it is so much easier and nicer. When I was using the cura program i had alot more problems. I cancelled one print and restarted it and for some reason my z axes went way low and started digging into my glass protector. That was after it did the leveling. Very upsetting. Lol. With simplfly3d I have not had any problems with it. Just a newer learning curve. I had to change the blower fan because it was on off working. Then it just stopped working. The fans are cheaply made and I would suggest changing all. Ill let you know when im done design the bracket for the ribbon cable maybe you can give some advice or pointer.
Thanks, I appreciate the tip about Cura. When I get my printer back on line I’ll give it a try. Yes I have changed my fan once, the first one I damaged by accidentally hooking it up backwards. As I say, I have had intermittent problems with my axis drivers overheating and causing the print to slip. Thinking of adding a second fan to the control box.
How is your printer configured? I’m having the same problems at the moment. I bought the printer and ran the single extruder test print from the SD card that was provided. Then I installed simplify and ran it but I think that made the printer a little confused because x, y, and z coordinates were all off. Then I unplugged the pc from the printer and that’s when the extruder ran off the bed while doing a bed leveling test and the BL touch needle took a pretty nasty hit on the bed. At this point, my printer is sitting with the second extruder that’s jumped the belt and is making a grinding noise when moving and the same goes for the z motor. Is there a reset button or a way to re calibrate all of this???
Hi Joe4588!
I’m not sure, I haven’t tried Simplify, I use Cura for a slicer program. I use Pronteface to set the initial Z offset and then I will initiate a bed level routine. I attached a Z offset calibration routine that I use. You will need Pronteface software to connect to the printer and issue commands from the command prompt. Pronteface is a free download. If you have your original firmware I would suggest you reload it to your printer. Then First of all set your Z offset with the attached routine. Then Issue an autocal command. If you like I can send a copy of my firmware, but I think you would be better off using your original. Also Ada Fang at Formbot is very helpful. My firmware level is 1.1.0-RC7. I can share it if you need but I wouldn’t want you to install an older version of firmware.
my_zoffset_calibration_procedure.pdf (13.7 KB)
I don’t think Ada would mind me sharing this. ada-fang@formbot3d.com
Hey Frank_66, I’ve been in touch with Ada a few times but with the time difference and the slight language barrier, it’s hard to get a hold of them. They’re actually sending out a new needle for my BL Touch sensor. The problem with my extruders is that extruder one failed to go back home after the auto home and when running the 2nd extruder test, extruder 2 bumped the 1st one and jumped the belt. Ever since that occurrence the 2nd extruder has been making a weird noise, jumpy belt, and isn’t able to find its way back home to its dock correctly. It’ll try to run further past the sensor. With the Z axis motor, I think the on board computer got confused with simplify3d so on my screen on the printer it’s blinking x? y? and z?. The Z axis then got stuck around 200mm Z height and wouldn’t come down because it thought it was at zero. I turned the motors manually with my hand with the printer off to bring it back down (was that a bad move?). Now, I’m not sure if it’s not perfectly leveled to the bed but the Z movements are very slow and also gritty like the 2nd extruders movements. Can you tell I’m lost and have no experiece with 3d printers? hahaha
Well Joe, it sounds like you have a different machine. My extruders are mounted to the same carriage. Where one goes, so goes the other, they are locked to a constant distance apart. So I’m sorry I can’t give any advice on that. It sounds like they need to have their home positions re-configured but I wouldn’t know how. Like I say, mine are locked to the same carriage a fixed distance apart.
The only way I know of to reset the machine is to re-install the firmware with the original settings. It is loaded on the SD card that came with the machine. Now, I don’t have a lot of experience with this either, I’m new at 3D printing, I bought the Formbot TRex 2 last year, it is my first and only printer. I know after I start mine up the BL touch sensor will check to make sure you are off of the bed. If you are not, it will blink and won’t allow the extruder carriage to move at all. So you have to raise the extuder up to get BL touch off the bed. So if you have a problem with BL touch that may be causing your printer to lock up.
My biggest problem with the machine was getting the Z offset calibrated correctly. That was why I sent that little procedure, I wrote the steps down so I wouldn’t forget. You send the printer carriage home and slowly move it toward the bed until it touches a piece of paper. Then you read the Z offset and install it in the firmware. Then save to eeprom. Then run an autocal routine.
Sorry, cant help with the extruders running into each other problem. They must have revised the machine since I purchased.
The newer T-rex 2 is the same. We essentially have the same machine mine is also fixed to one carriage. I think the second extruder just jumped off the belt and is not in sync with what x value it thinks it’s on. As far as the Z value, I don’t know why it’s so gritty when it’s moving up and down. It could quite possibly be that one side is higher than the other. You said the firmware is on the SD card they send the printer out with? Might have a look at that tomorrow then.
yes, formbot also had me grease my Z position screws. It could be you have some plastic or dirt on the screw threads? In fact they had me clean and grease all of the slide bars and the screws. Also as far as height of the X axis, you can take a ruler and measure off the bed to the X axis mounting bar. Should be exactly the same on both ends. If they are not you can move one stepping motors up or down until both sides are the same. When I first start my machine I will do a homing procedure. If BL touch says it is OK, the machine will drive all the way in the Y direction until it hits a small limit switch. It now knows it’s Y position. Then it will drive all the way it can in the x direction until it hits the X limit switch. It now knows its X position. Then it will drive to the middle of the bed and lower in the Z direction until BL touch hits the bed. It now knows the Z direction. Now it is ready to print. Your limit switches should never allow your bed to move beyond their zero position. I had this problem, my limit switch in the Y plane was broken and the bed went too far. I purchased some spare switches since then. Now also, to load your firmware, the G-code is written with Arduino software. So you should also have the Arduino software app on your SD card to open your firmware application software and connect to your machine. On the SD card in the User Manual folder there are instructions.
joe4588
16
something is definitely wrong with my x limit switch or the programming is confused because it will run all the way to home on the right and try to go further. As far as the z axis, I can not figure out why it’s so slow and gritty. it seems to have a stutter when moving and sounds like there’s something working against the motor. I ran the BL touch and the sensor touched the bed but still tried to run lower than the bed level.
Well Joe, when you send the machine home it should go left until it hits the x limit. The x limit switch should stop the motor and the limit tells the controller it’s X zero position. I’m not sure but it sounds like from zero on the left if it is running too far right, the span might be defined incorrectly in the firmware. Or maybe the X limit wiring isn’t seated. You can try tracing the wiring from the limit switch back to the control box and make sure all connections are good. There is a section of firmware that defines the size of your bed. Once it hits the x limit and knows zero position, it should only be allowed to move 400 mm to the right. There is also a section that defines how many mm/step your motor moves the bed. These have to be set right, but I would think they would already be set in the original firmware. I’ll try to find these settings. They may be restored if you reload your firmware.
joe4588
18
Thanks for all the help and input Frank, I really do appreciate it. You said the firmware should be on my SD card? How do I check which firmware I’m on in my machine and where is the file located on the SD card?
Sorry for taking so Long Joe I had to work today. So I think I may have found out what happened to your machine. So you are using dual extruders. In Formbot’s instruction to use dual extruders they tell you to set the extruders 200 mm apart. I don’t use dual extruders because my prints are usually to large to allow for dual extruders, ( I sent a picture of how my extruders are arranged, right next to each other.) If you use dual extruders and set them up 200 mm apart, you need to change the travel limits in the firmware to 200 mm*400 mm*470 mm. If you don’t do this the controller will think it can still drive your extruder 400 mm span and it will drive your second extruder right off the bed. I’m trying to attach Formbot’s manual that tells this.
As for the firmware, if you look on your SD card, under Marlin Firmware / Marlin / Marlin.ino. Marlin.ino is your firmware file. Double click to open it up. If you look under the configuration.h tab then select edit and then select find, search for "travel limits" . Before you make any changes, make a copy of your original firmware. Change the travel limits to 200, 400, 470. To download the changes, notice I’ve highlighted the upload button in an attached picture. Connect the provided USB cable to your printer and select upload. Arduino will search for your machine and if it finds it, will load your changes to the printer. I’m having trouble attaching pictures, I think I need to reboot my computer but I will log back in and attach pictures in a separate reply.
Hi Joe, these image files might help you understand what to do. I may be wrong, maybe you didn’t set your extruders apart, but it sure sounds like that’s the problem
3.switch_extruders.pdf (672 KB)