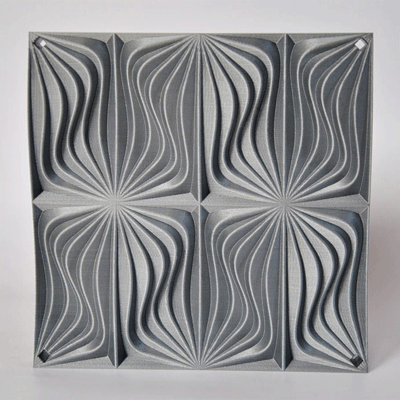
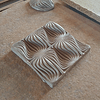
The “Corallo” tile is an experimental design project involving new innovative designing tools with old traditional artisan manufacturing processes.
I’m native of OVAR, a small city in the north of Portugal with a long tradition in the tile production called AZULEJOS. This was the input needed to start searching for a local artisan with whom to collaborate. Luckily I found Georgina Queiròs, a bright young artesian interested in the project.
DESIGN
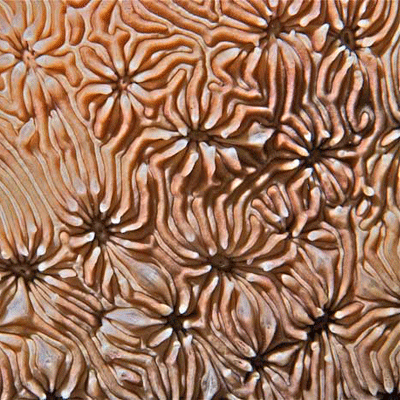
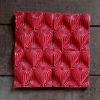
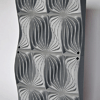
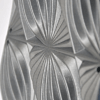
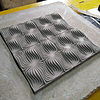
Corallo was inspired on the fluidity and beauty of a particular coral structure. Different depths and sinuous forms create a continuous sensation of movement and an interesting changing light contrast.
In order to digital fabricate a 3D print of the tile, later used as pattern for the plaster mold production, I had to create first a 3D model using a CAD software (in my case Rhinoceros 5.0).
Other than beauty, it was essential to design the tile so the piece could be perfectly printed and easily released from the mold without problems.
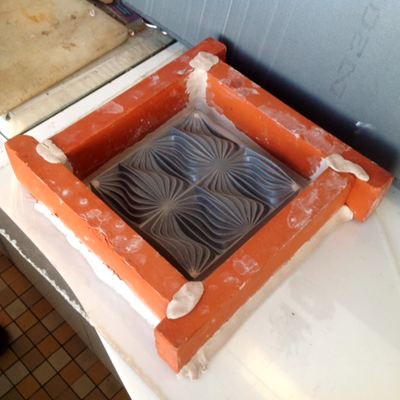
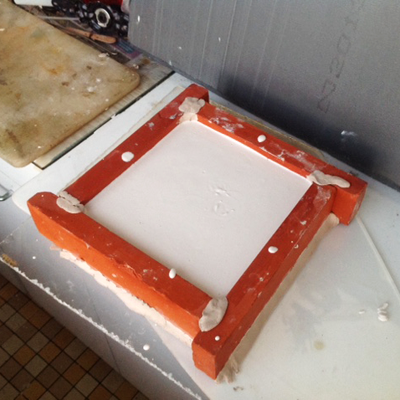
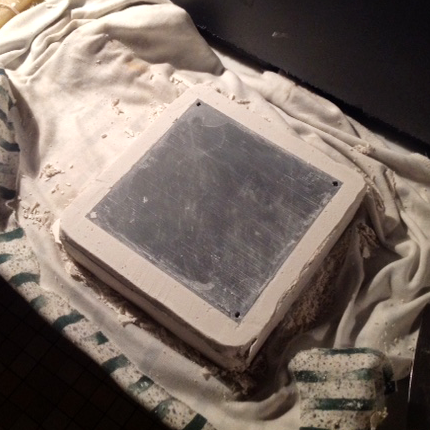
PLASTER MOLD
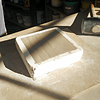
Having an high detailed 3D print of the Corallo tile, I started producing the plaster mold. It was quite easy to do it, except for the fact that , it is crucial to mix the plaster with the water in a way that doesn’t create lumps and it must be done quickly because the plaster dries fast.
I started the mold by creating a frame with some old bricks on a piece of glass. Hot glued the tile print to the bottom so it didn’t move and proceeded by closing all the gaps with plasticine. Before casting the plaster, the 3D print and the frame were impregnated with a specific soap to facilitate the release of the mold.
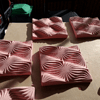
TILE PRODUCTION
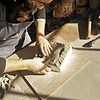
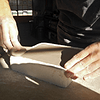
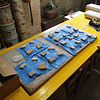
Once dried, the plaster mold was ready to be used in the tile production. The first step was to compress the stoneware clay into the mold’s surface, ensuring that all the small cavities and edges were filled. Then the top surface was flatted and the tile carefully removed by turning the mold upside down. After released, the tile was meticulously rectified with some minor edge corrections.
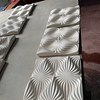
TILE DRYING
Before proceeding with the firing stage, tiles must dry, passing from grey to almost white colour. This process can take up to 2 weeks if dried naturally during winter. In a tile with this kind of shape, characterized by different material thickness, there is a big probability that the tips will curl during the procedure. To avoid that, small pieces of stone were used as weights to prevent corners from lifting. Is very important that the tiles are well dried before firing because otherwise they can blow up.
FIRING STAGE
When the tiles were properly dried, was time to proceed with the firing stage. At 700°C the clay starts to gain toughness and reaching the 900° C, it becomes white and a porous. This is crucial to the glaze phase, since the glaze colour powders need a rough surface to better adhere.
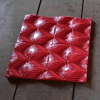
GLAZE
Glazing renders the stoneware clay waterproof, sealing the inherent porosity and giving it colour. The first step consists in prudently submerge the tiles in a recipient containing a liquid glaze colour. The glaze layer must be thin and uniformly distributed, being careful to perfectly clean the tile’s bottom so it doesn’t fuse with the oven’s walls when reaching the vitrification temperature of 1050°C.
I was very happy wih the final result. This experiment has proved that innovation and tradition can live together. Joining designer’s technological knowledge with artisan’s manufacturing know-how, can result in a new aesthetic language. A language characterized by “humanized complex forms”.
* If you like the project, please vote for the instructables 3D Printing Contest here: http://www.instructables.com/id/Corallo-Tile/