I’ve been using my Mankati for nearly a year now. Some pros and some cons.

Cons:

Bloody hell this thing is heavy to cart around. Make sure your wearing a weight lifters belt if you want to move it. I’m always nervous about the plastic handles on the top of it held on with what i concider not very big screw in bolts. Been waiting to be stood with them in my hands while the printer is bouncing along the ground.

Glass bed is not as smooth or as flat as one would expect an expensive peice of glass to be. Probably caused by adjusting the 4 corner levalling bolts individually and heating and cooling it down.

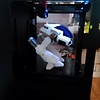
Feeding new filament in. The brass threaded connector on the end of the feed tubes has a lip that your filament catches on. This is made even harder by the filament being curved. If you try to straight it out it snaps off so: The best way ive found to do it is undo the pipe with the spanner provided, feed the filament up through the extruder then into the tube. Once enough filament has been pushed in you can then re-attach the tube. A bit of a faff at first but you get used to it./

The tension bolts on the extruder could be 5 or 6mm longer to make life easier when fitting new filament.

I have taken the second nozzle off as it can catch on a string on you model and prise it loose from the bed. Always happened when the model was nearly done. (lots of swearing and start hours of printing all over again).

When printing with ABS. A right nightmare to figure out how to turn the right hand (second) fan off. By default it is on all the time and there is no way to control it from the slicing software. You have delve deep into the menu on the printer and manually set it to be off (pain).

Right there’s all the griping out the way.

Pros:

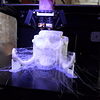
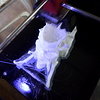
I absolutely love this printer to bits. Its built like and tank and really solid. You dont have to regularly tighten anything up. It is rock sold, does not rattle or shake itself to bits. And, it is quite quiet as well. I often leave it printing all night.

The menu system controlled by rotating a knob can be a bit fiddly but once you get used to it you can do things quite quickly.

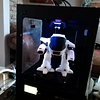
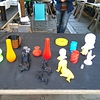
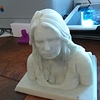
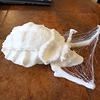
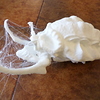
The print quality is excellent. I have yet to bother with printing at what is called high res (0.1mm) as the standard 0.2mm comes out as good if not better than anyone elses prints i have seen.

The build area is great. 25cm x 25cm x 30cm tall. I could easily print a full sized full face crash helmet and wear it.

A bit shallow of me but! the printer does look really good. It looks like a profesional peice of technology and not like something that was slapped together over the weekend out of balsa wood, sticky tape and string.

If you do get a blockage in the nozzle it’s very easy to just remove it with the supplied spanner and clean it. I persomally put a thick cloth on the bed under the nozzle so as not to drop it on the very expensive glass.

The thickness of the shell goes inward from the external surface of the print and not swelling the ouitside dimensions of the print making it the wrong size (like other printers and slicers i’ve used do).

Conclusion:

Would i buy another one of these printers? YES i would. Just like any 3D printer they do need to be baby sat now and again but over all very reliable.

Good old fashoned (the cheapest) boots hair spray is great for helping PLA prints to stick on the bed. Run the print with the bed at 45% for the whole print and it holds very well. Once the print is complete the bed will cool and the print will pop off with a very flat bottom.

I quite often use a brim (even on large prints) to help hold the item on the bed. Just run your thumb around the bottom edge of the print folding the brim back and it just comes away cleanly.

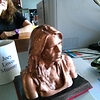
The other day i paused a print halfway through and changed the filament color. Worked quite well albeint with a slight caviatt. Once paused move the nozzle away from the print in one direction only. This stops any oozing and new fli==ilament being loaded from formom a tall blob on the print that will interfere with the continuation of the print. Only moving the nozzle in one direction makes it a lot easier to move it back into the correct place to continue printing.

If you need a very good finish on the print then just print it with a thicker shell and sand it with sand paper, small modelling files or even a dremel (be gentle with the dremel on a low speed or the friction melts it).

I have found with PLA that using a heat source (i use a lighter or brulee torch) makes the surface shinny again. Be carefull as it is quite easy to over do it and melt the print.

Also with PLA you can matt the surface with acetone on a brush, cloth or vapour bath. I know what you are thinking. Acetone vapour bath makes ABS shiny but it’s true it makes PLA matt.

Right i’ve rambled on quite enough for now and am going to let you guys go. Please feel free to chime in or even dissagree with me as i don’t get to discuss 3D printing with anyone who knows what i’m talking about very often. Bye till next time i need to emty out what i’m thinking into the keyboard.

6 Likes

Hi David,

It’s nice to hear from a fellow Mankati user ( and yes same problem over here nobody to discuss 3D printing with). I’ve been using my printer also almost a year and I’m very happy with it. I used to have an Ultimaker but that one was giving me to much trouble so I desided to buy the Mankati and no regrets!!!.

I’m trying to get the second fan off but no luck yet could you please tell how you did it?

Hope to hear from you soon.

Regards Marcha

Hi Marcha

I think i might have lied (prob thinking of my other printer) when i said there was a setting in the menu. I have just spent 15 mins looking at every menu option and it’s not there. Sorry! Anyway as i type it is all coming back to me.

There are few options:

Option 1 (this is what i did) put a peice of masking tape over the bottom hole in the fan shrowd (actually works well)

Option 2 There is a new shrowd that can be printed and fitted Mankati air concentrator by sammyuht - Thingiverse

Option 3 Cut one of the wires from the fan inside the black cable tidy abot it and insert a little switch so that you can just turn it on or off at will. One guy i heard of fitted a switch to the front of the case but i think that’s a lot of drilling and rewiring.

Anyway hope this helps. Sometimes you just have to be brave and get the tools out LOL.

ow you naughty boy! Nah it’s ok I’m not angry just a little disapointed :wink: . I’ve tryed option 1 and that will do for now. I havn’t got around to print option 2 and I just put a new fan in because I put my tweezers in the fan (by accident) and it doesn’t like that, so I’m not messing around with it again.

Yes you’re talking about SeaMogrel he did an awesome job modifying his Mankati. I’m not that brave (yet) who know’s in the future…

Hi Marcha

Do you have trouble fitting new filament on yours as well. I tried to print a little cone funnel but it didn’t work. Just have to keep sharpeing the end of the filament to a point with a stanley knife LOL

Yes I always cut the end to a sharp point but I’m using a wire cutter, it’s fast and easy

Thanks for sharing! Do you have any pics of the printer and some prints from it?

Hi Guys

Here are some of the things i have printed on my Mankati.

Hi guys

Here are a few more including scans i did with my sense scanner of my wife.

Very nice David.

Here are some pictures of my prints and designs (sorry for the poor quality photo’s).

You can see in the first picture that I made a arcrylic glass top on top of my printer. It helps keeping the heat inside so no warping for me anymore.

My next project will be the new light saber, my 8 year old son wants to have it very badly (and when I’m finished my other son wants to have it aswell ofcouse :wink: ) Next week I’ll start this project and hopefully it will be easy to print.

When it’s done I’ll post a picture

Hi Macha

Very nice. Regarding the second photo: Is that so you can fire the sugar lumps into your tea at speed LOL.

I have another little trick i came up with for you guys. I you have a large boject that needs to be split for printing and joined later or a complicated print that needs to be split to get flat surfaces for printing. Get a cheap 3D printing pen then you can use it as a welder. While the hot end of the pen is melting the seam together you feed plastic into the join just like rel welding. It is amazing how much it looks like real world welding. You can leave the weld or what i do is sand the join smooth with a dremel on slow. This method creates an incredibly strong join.

Next time i use this technique I’ll put some photos up to show each stage.

Hi David,

Whahaha no the cup is for my husband (wich I love dearly don’t get me wrong) at work his colleagues always steal his coffee so now he has a coffee cup of his own.

That is a great idea to buy a 3D pen to weld all the parts together. I wanted to buy a pen anyway so now I got a great excuse to buy one LOL.

I thought I’d put up a few more pics of the Ed209 before i painted any of the parts. Including an 18 hour print per leg pic.

I am also currently printing a Predator Skull and will post a pic once it is complete. I usually clean the strings away but i quite like them on this model as they look like cobwebs and might keep them.

If anyone wants to have a chat at sometime about 3D printing then you can find me on Skype. Search for David Jolliff, Chesterfield, Uk

Print of the Predator Skull has just finished. Well and truly pleased with the result and thought I’d share. I left the srtings on the front as they will look great as cobwebs.

SO! As a further P.S. to my Mankati cunclusion. Don’t let anyone tell you that your Mankati is not a great printer because it really is.

Wow, they came out very well!

Well here is a picture of the telescopic light saber that I’ve printed so far. It’s not finished yet but we’re getting there.

The red parts I’ve printed with PETG. Very easy to print and it looks great.

As soon as it’s finished I will post a picture

Hi Yichan. It’s been a while since we have spoken. Is it ok to pop in and see you guys next time I’m in the area. I am planning on popping over to wedo3dprinting to buy some more fillament in a week or two.

Hi Macha. Looking really good! It’s always great to see others using the bigger build size of the Mankati and making larger prints.

My problem is that i print often and my house is starting to get full LOL. I don’t think there is a room in the house without some 3D printed objects in them. My wife does put up with a lot.

Doiing a large print today to get it finished and in the post for a 3dhubs client about 100 miles away tomorrow morning. Trouble is that i ran out of fillament and was forced to feed short leftover bits into the extruder as each got up past the stepper motor. Absolute nightmare and will never let my stocks run down so low again. Here are some photos of the two large parts which i used the welding technique on i was talking about before. The first two show the weld and the third shows after i dremelled and sanded the seam down.

Wauw that looks great, now I really need to get me one of those pens.

I’m also printing a lot every day my printer is printing but in my case I’m a 3d jewelry designer so most of the things I print are not so big. But I have two young boys and they want to have larger things, like the telescopic light saber. I print the occasional lamp shade, vase or birdhouse offcourse, it’s so addictive especialy when you design your own stuff.