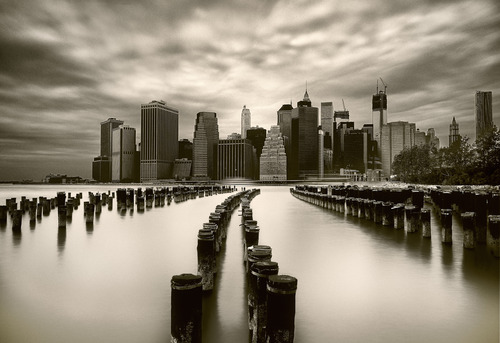
We rarely hear about photographers using 3D printing in inventive ways, that is until we ran into an order from Florida-based photographer Sandra Canning. Sandra is working with @ in Miami to organize an art exhibit around 3D printed lithophanes.

The original picture
Revitalizing an old art form
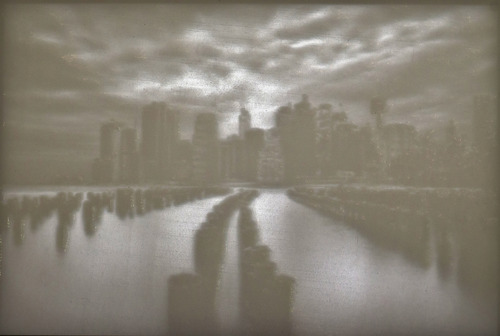
Traditionally, lithophanes are 3-dimensional images, etched or molded into a thin sheet of porcelain, which can only be seen clearly when they are backlit. Sandra’s lithophanes were inspired by 1800s lithophanes, but unlike their predecessors, they have been printed with White Resin on a Form 1 and other SLA printers.
Having no previous experience with 3D printing, Sandra decided to work with a retail service that helped her produce and design her first prototype (based on the image above) using an FDM printer. But FDM didn’t turn out to be the right solution and the quality of the print would not make the cut for a gallery show. Luckily, she met Jose, who’s been active in our community since April last year.

The 3d printed lithopane
Achieving the right print quality
Sandra’s first prototype was printed using FDM technology, but as Jose explains, this process would never deliver the desired outcome: “Instead of creating a solid part with gradual and highly defined surfaces, FDM type printers create a topographical map of sorts. The filament builds up in very thick layers, and for the purposes of this print, we were looking for thin layers and a highly defined surface. In addition, we needed to angle the part in every dimension to prevent any unnecessary material build-up that would erode the different parts of the lithophane.
That’s why I advised Sandra to try an SLA technique. Contrary to FDM, SLA uses liquid resin instead of plastic filament. To solve the build-up issue, we pitched the lithophane on the x and y axises and tilted it on the z axis. All the resin was able to flow off gradually as the part grew.”
The printer was set to a .025mm high resolution, so the print time took 32 hours in total. After removing the supports, Jose applied a light coating of clear UV resistant spray to keep the part from curling and yellowing any more than necessary. The results were simply stunning and have driven Sandra and Jose to host their own art exhibit: “The Art of 3D Printing.”
The 3D printed lithophane both lit and unlit
Meet the Maker
“As a fine art photographer, I started looking for ways to apply 3D printing in my work,” says Sandra. “All of the fine art related 3D printing I found involved sculptures, jewelry, fashion, but nothing for photographers. Why are photographers not invited to the Next Industrial Revolution Party? Then I stumbled on some lithophanes on Thingiverse. While I liked the idea, I knew that what I was looking at would not serve my audience. Then, I saw lithophanes from the 1800s and I fell in love. I became convinced that if I found the right 3D printer and the right material, I could create a little time machine and bring back something from the past. I have been on that quest ever since.”

Want to give lithophane printing a try? Check out this file on Thingiverse
This story is taken out of our old blog post and It was published on 17.7.2014 so not that some information might be outdated 
by Gloria Quintanilla