


What is electroless nickel plating and how does it work?
Want to learn about electroless nickel plating? Here’s a guide to using the post-processing technique, how it works, its common industrial uses, and more.
Read articleA comprehensive guide describing the range of post-processing options for FDM printed parts

FDM 3D printing is best suited for cost effective prototypes produced with short lead time. Layer lines are generally present on FDM prints making post processing an important step if a smooth surface is required. Some post processing methods can also add strength to prints helping to mitigate the anisotropic behavior of FDM parts.
This article will discuss the most common FDM post processing methods.
Curious about the cost and the available material options of FDM?
Support removal is typically the first stage of post-processing for any 3D printing technologies that require support to accurately produce parts. Support can generally be separated into 2 categories; standard and dissolvable. Unlike the other post-processing methods discussed in this article support removal is a mandatory requirement and does not produce an improved surface finish.
Process: Support material can generally be removed from the print with little effort, and cleaning of support material in hard to reach places (like holes or hollows) can be achieved with dental picks and needle-nose pliers. Well placed support structures, and proper print orientation, can greatly reduce aesthetic impact of support material on the final print.
Pros
Cons
| Finish | ★ ☆ ☆ ☆ ☆ |
| Tolerances | ★ ★ ☆ ☆ ☆ |
| Speed | ★ ★ ★ ★ ☆ |
| Suitable for | All FDM thermoplastics |
Process: Standard dissolvable support materials are removed from a print by placing the print in a bath of the appropriate solvent until the support material dissolves. The support is typically printed in:
Glass storage containers, like a mason jar, make excellent vessels for dissolving with Limonene. For dissolving in water, any non-porous container will work. For HIPS/ABS prints, a bath in a 1:1 ratio of (R)-(+)-limonene and isopropyl alcohol works very well for rapid support removal. Many other support materials, such as PVA (used with PLA) and HydroFill (PLA and ABS), simply dissolve in plain water.
Pro-tip: Speed up the dissolving time of soluble support material by using an ultrasonic cleaner, and changing the solvent solution once it becomes saturated with dissolved support material. Using a warm (not hot) solvent will also speed up dissolving time if an ultrasonic cleaner is not available.
Pros
Cons
| Finish | ★ ★ ★ ☆ ☆ |
| Tolerances | ★ ★ ☆ ☆ ☆ |
| Speed | ★ ★ ★ ★ ☆ |
| Suitable for | All FDM thermoplastics |
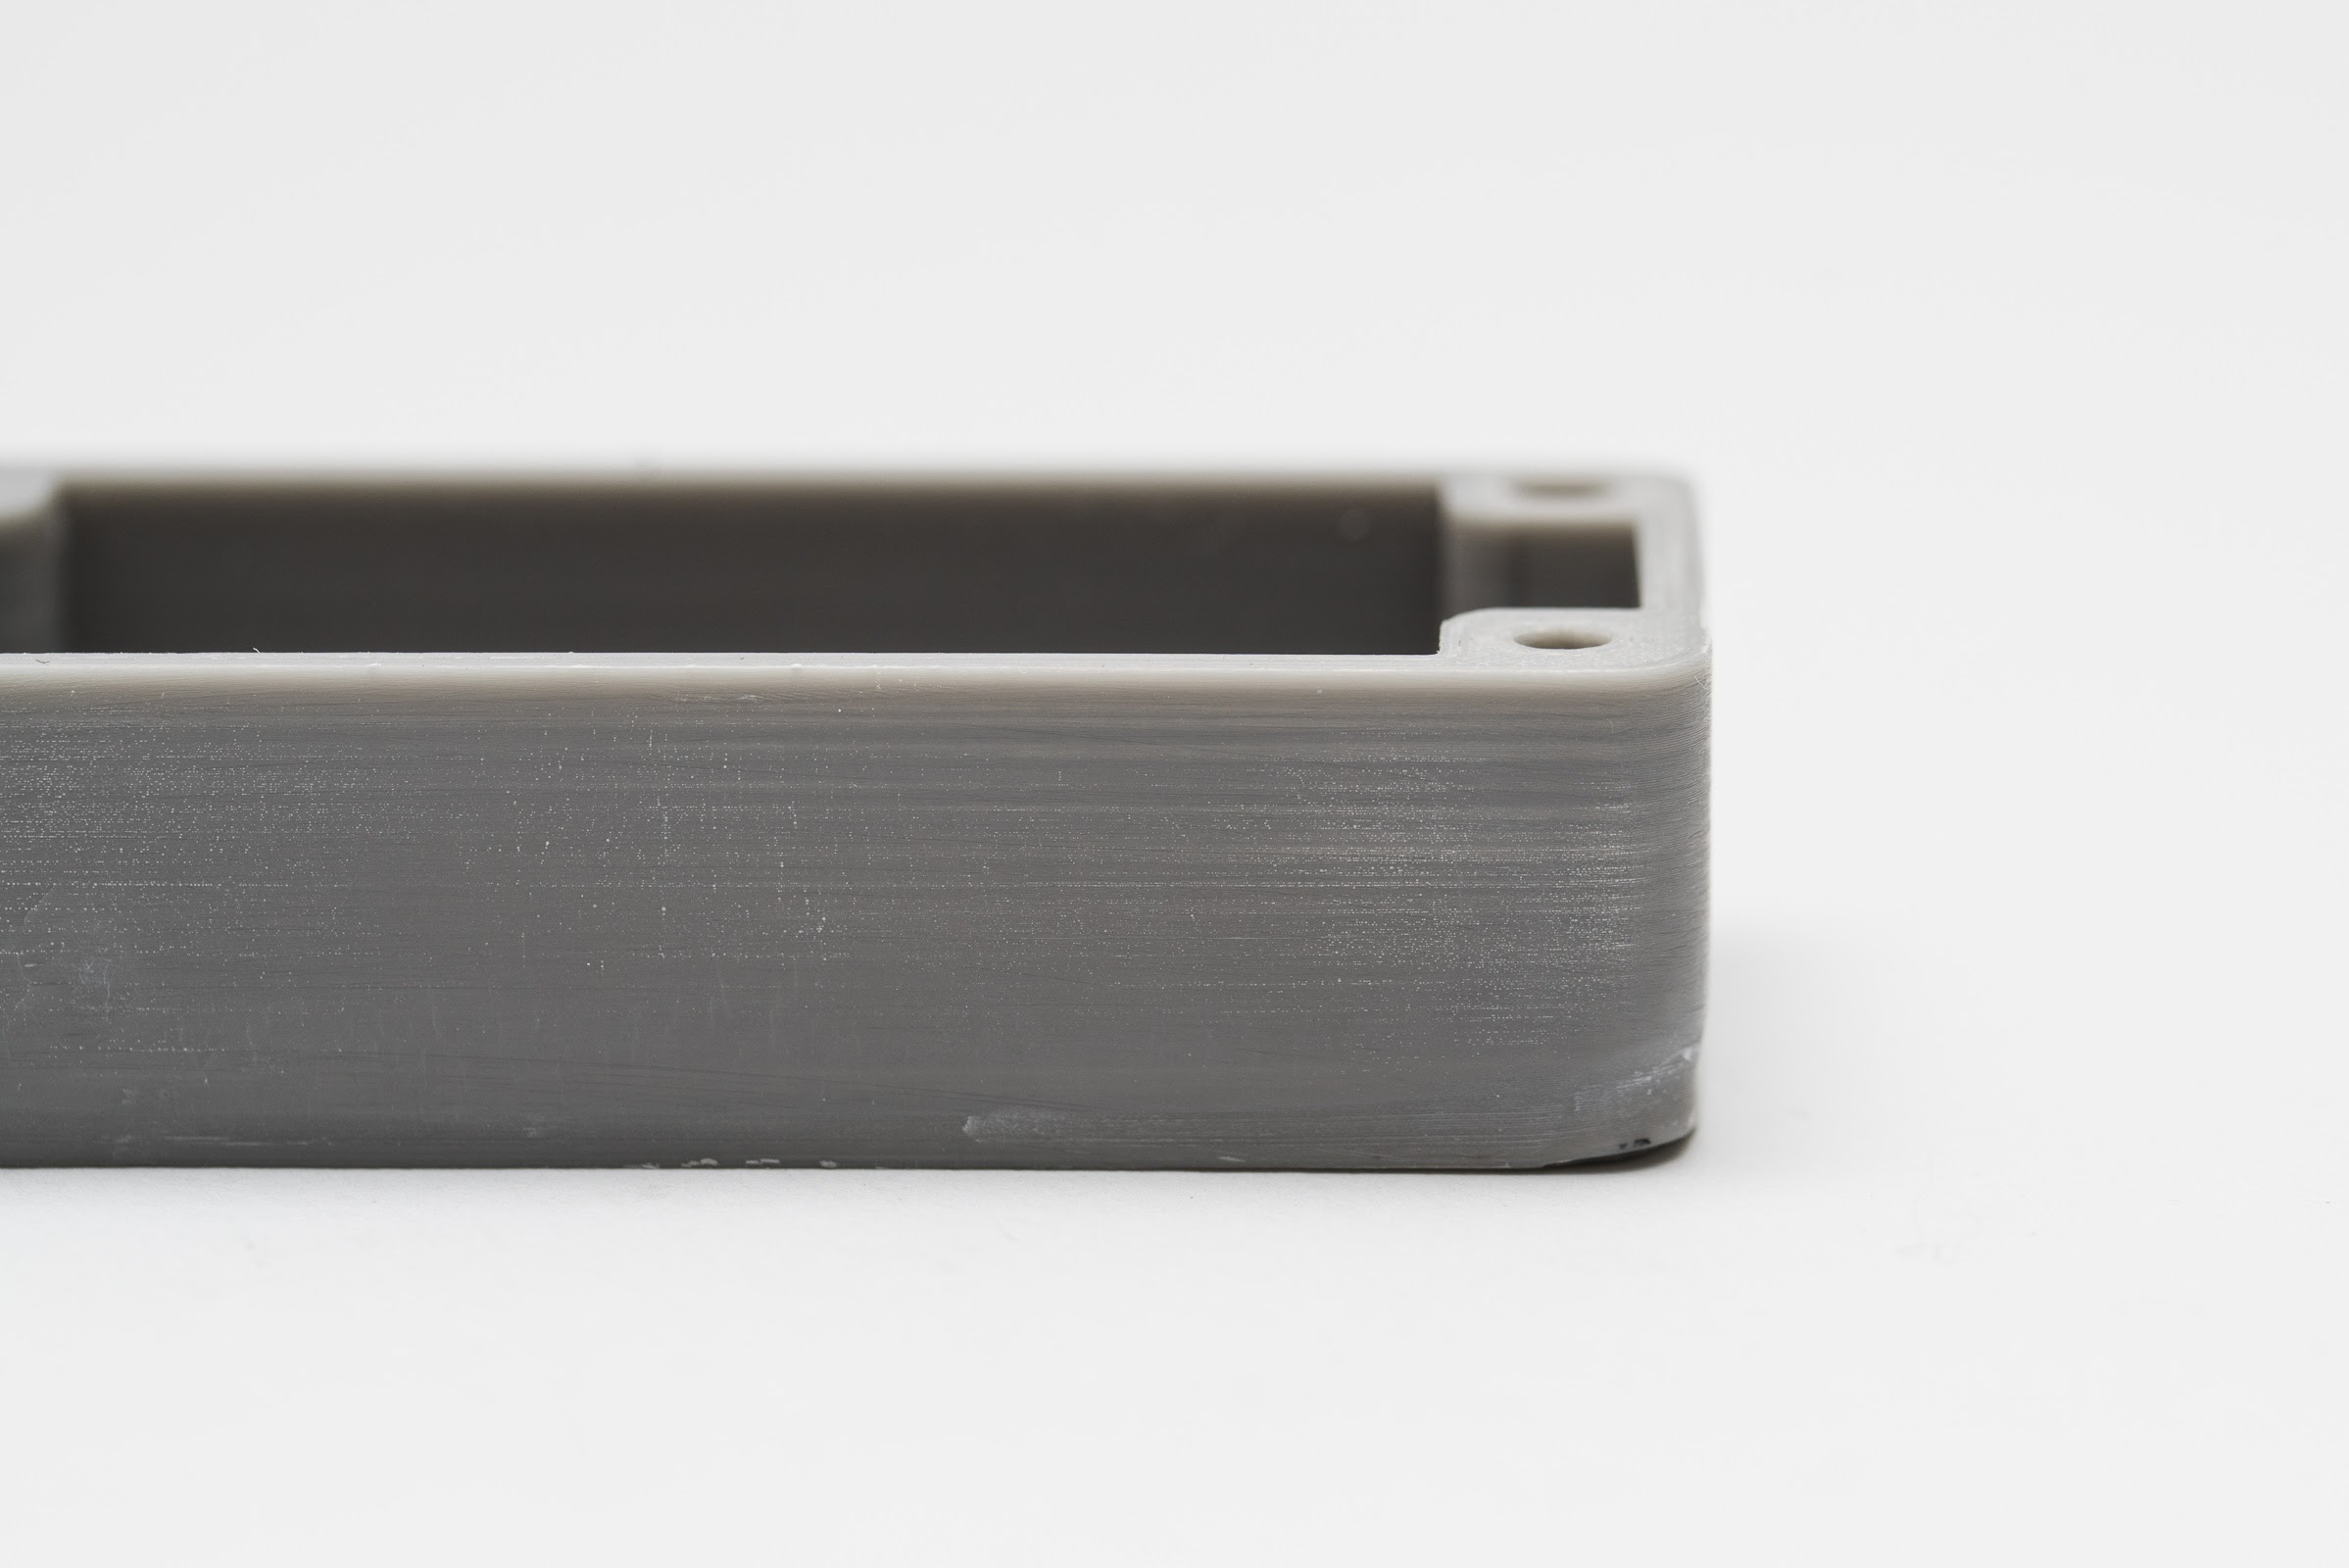
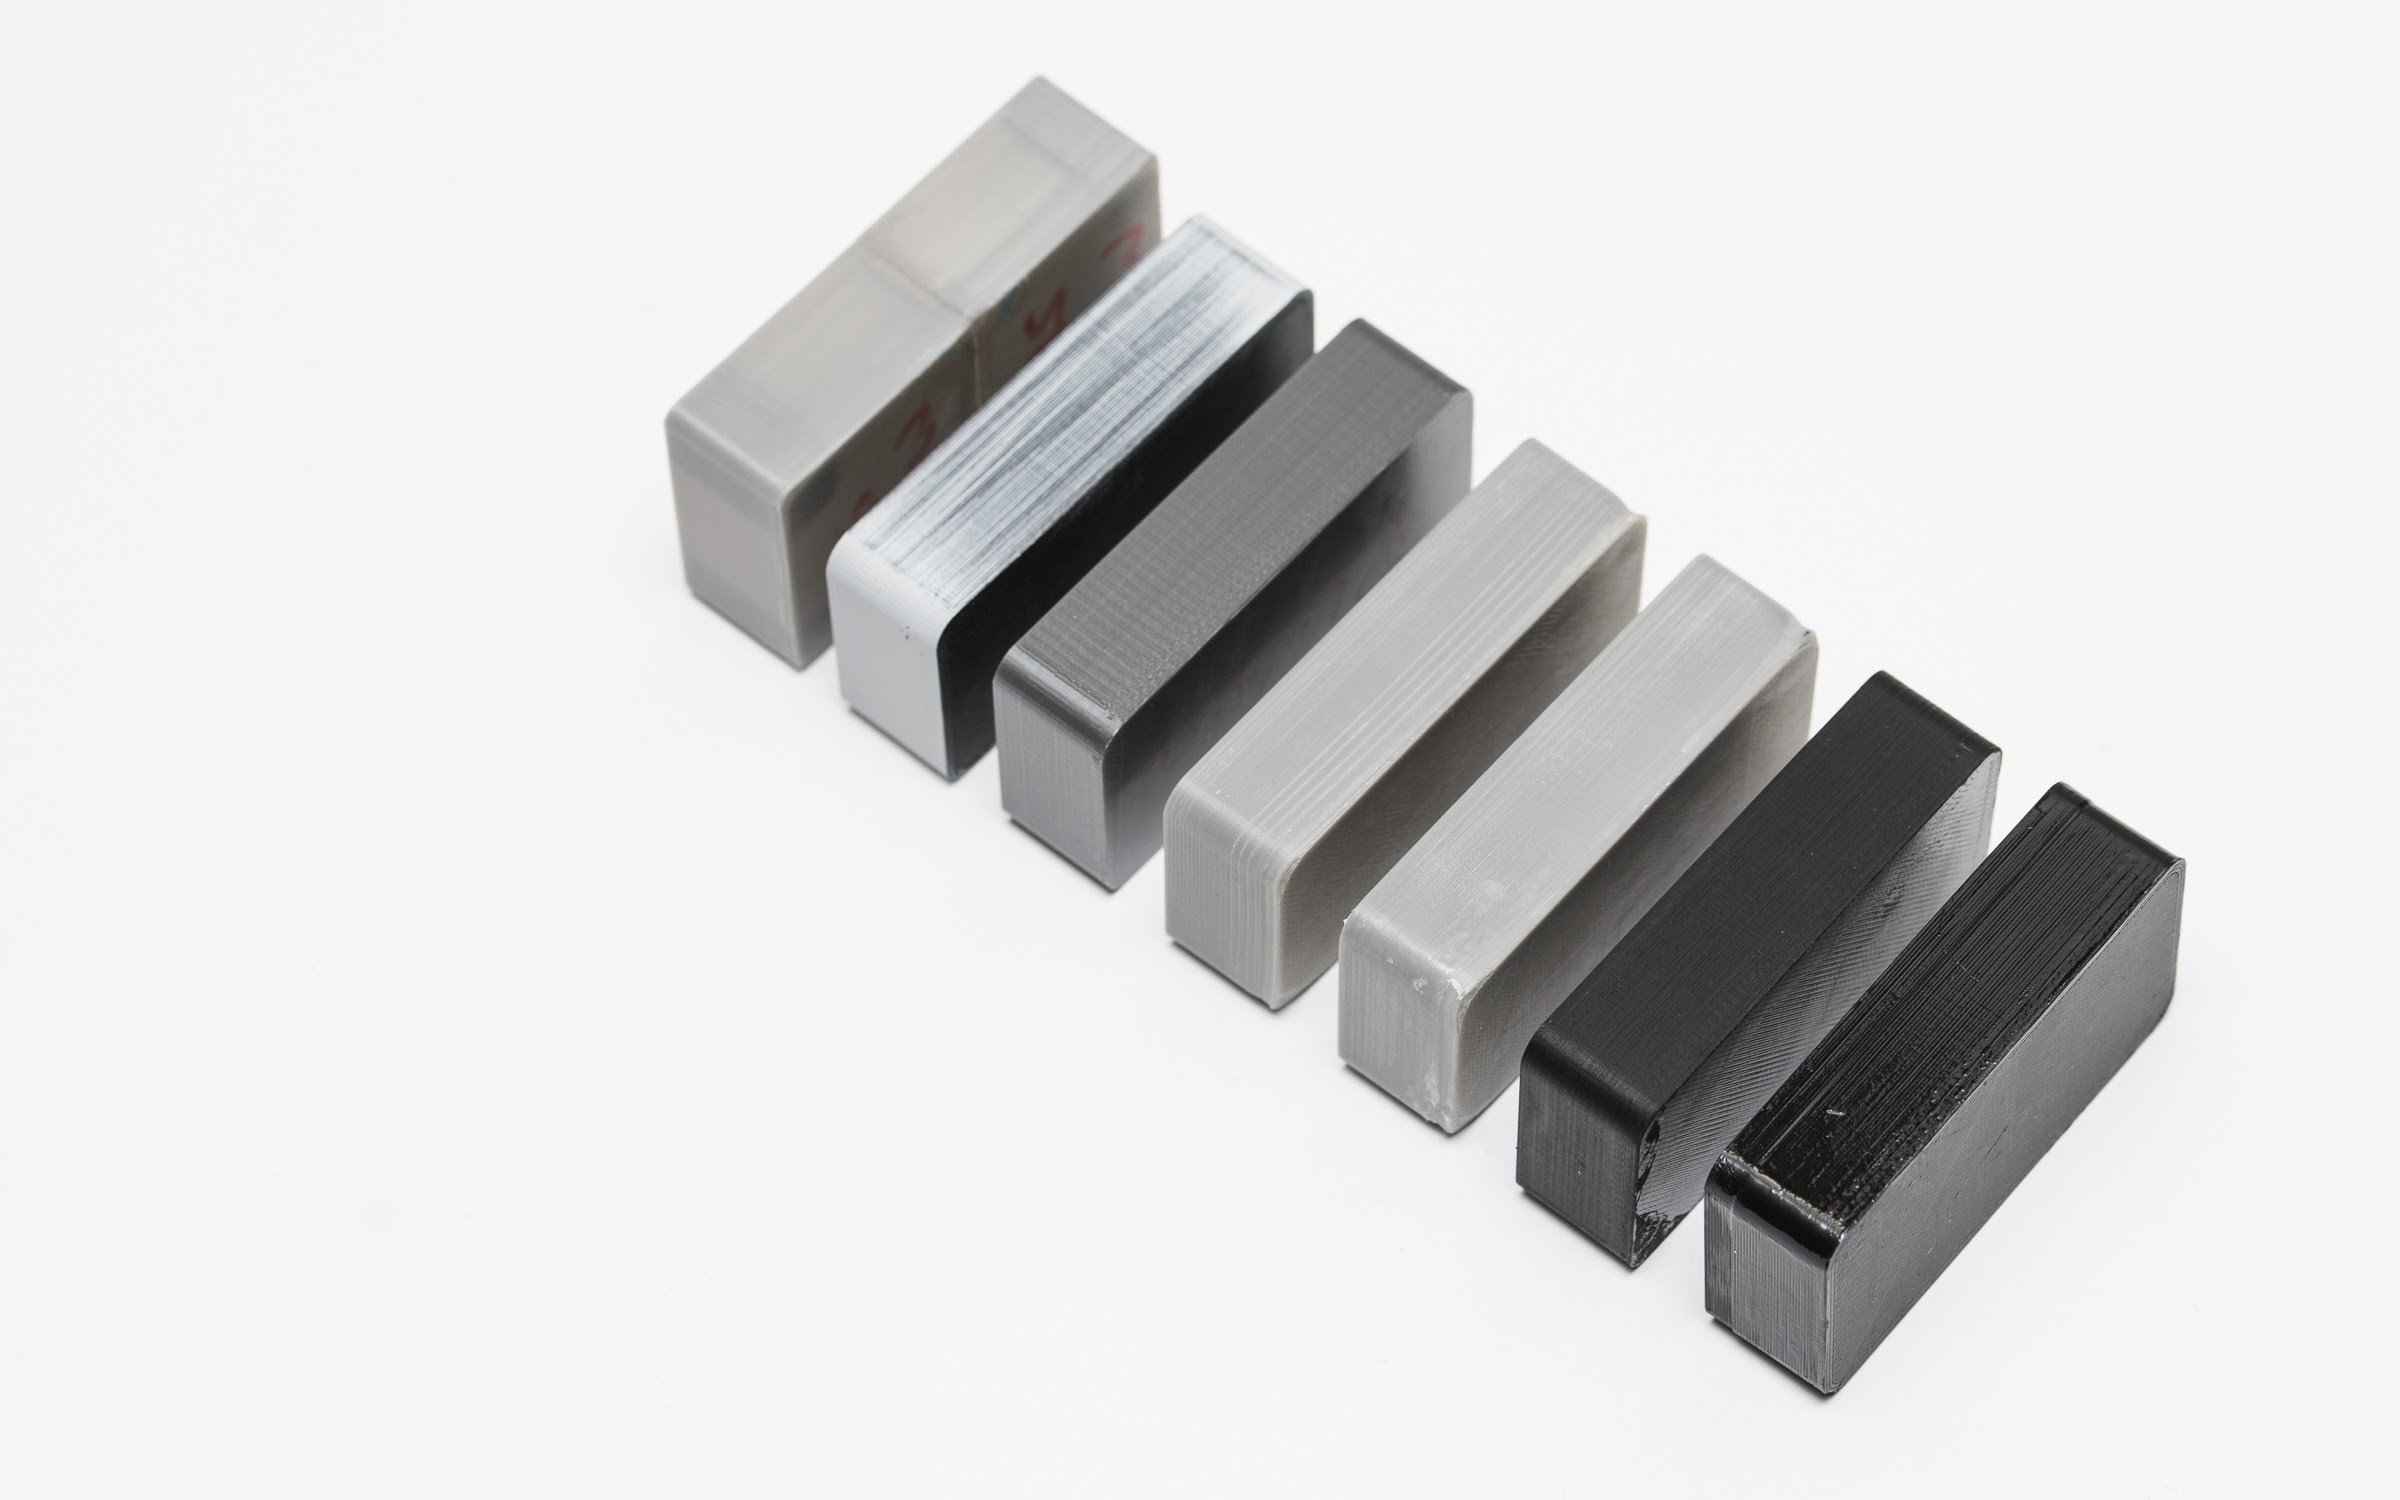
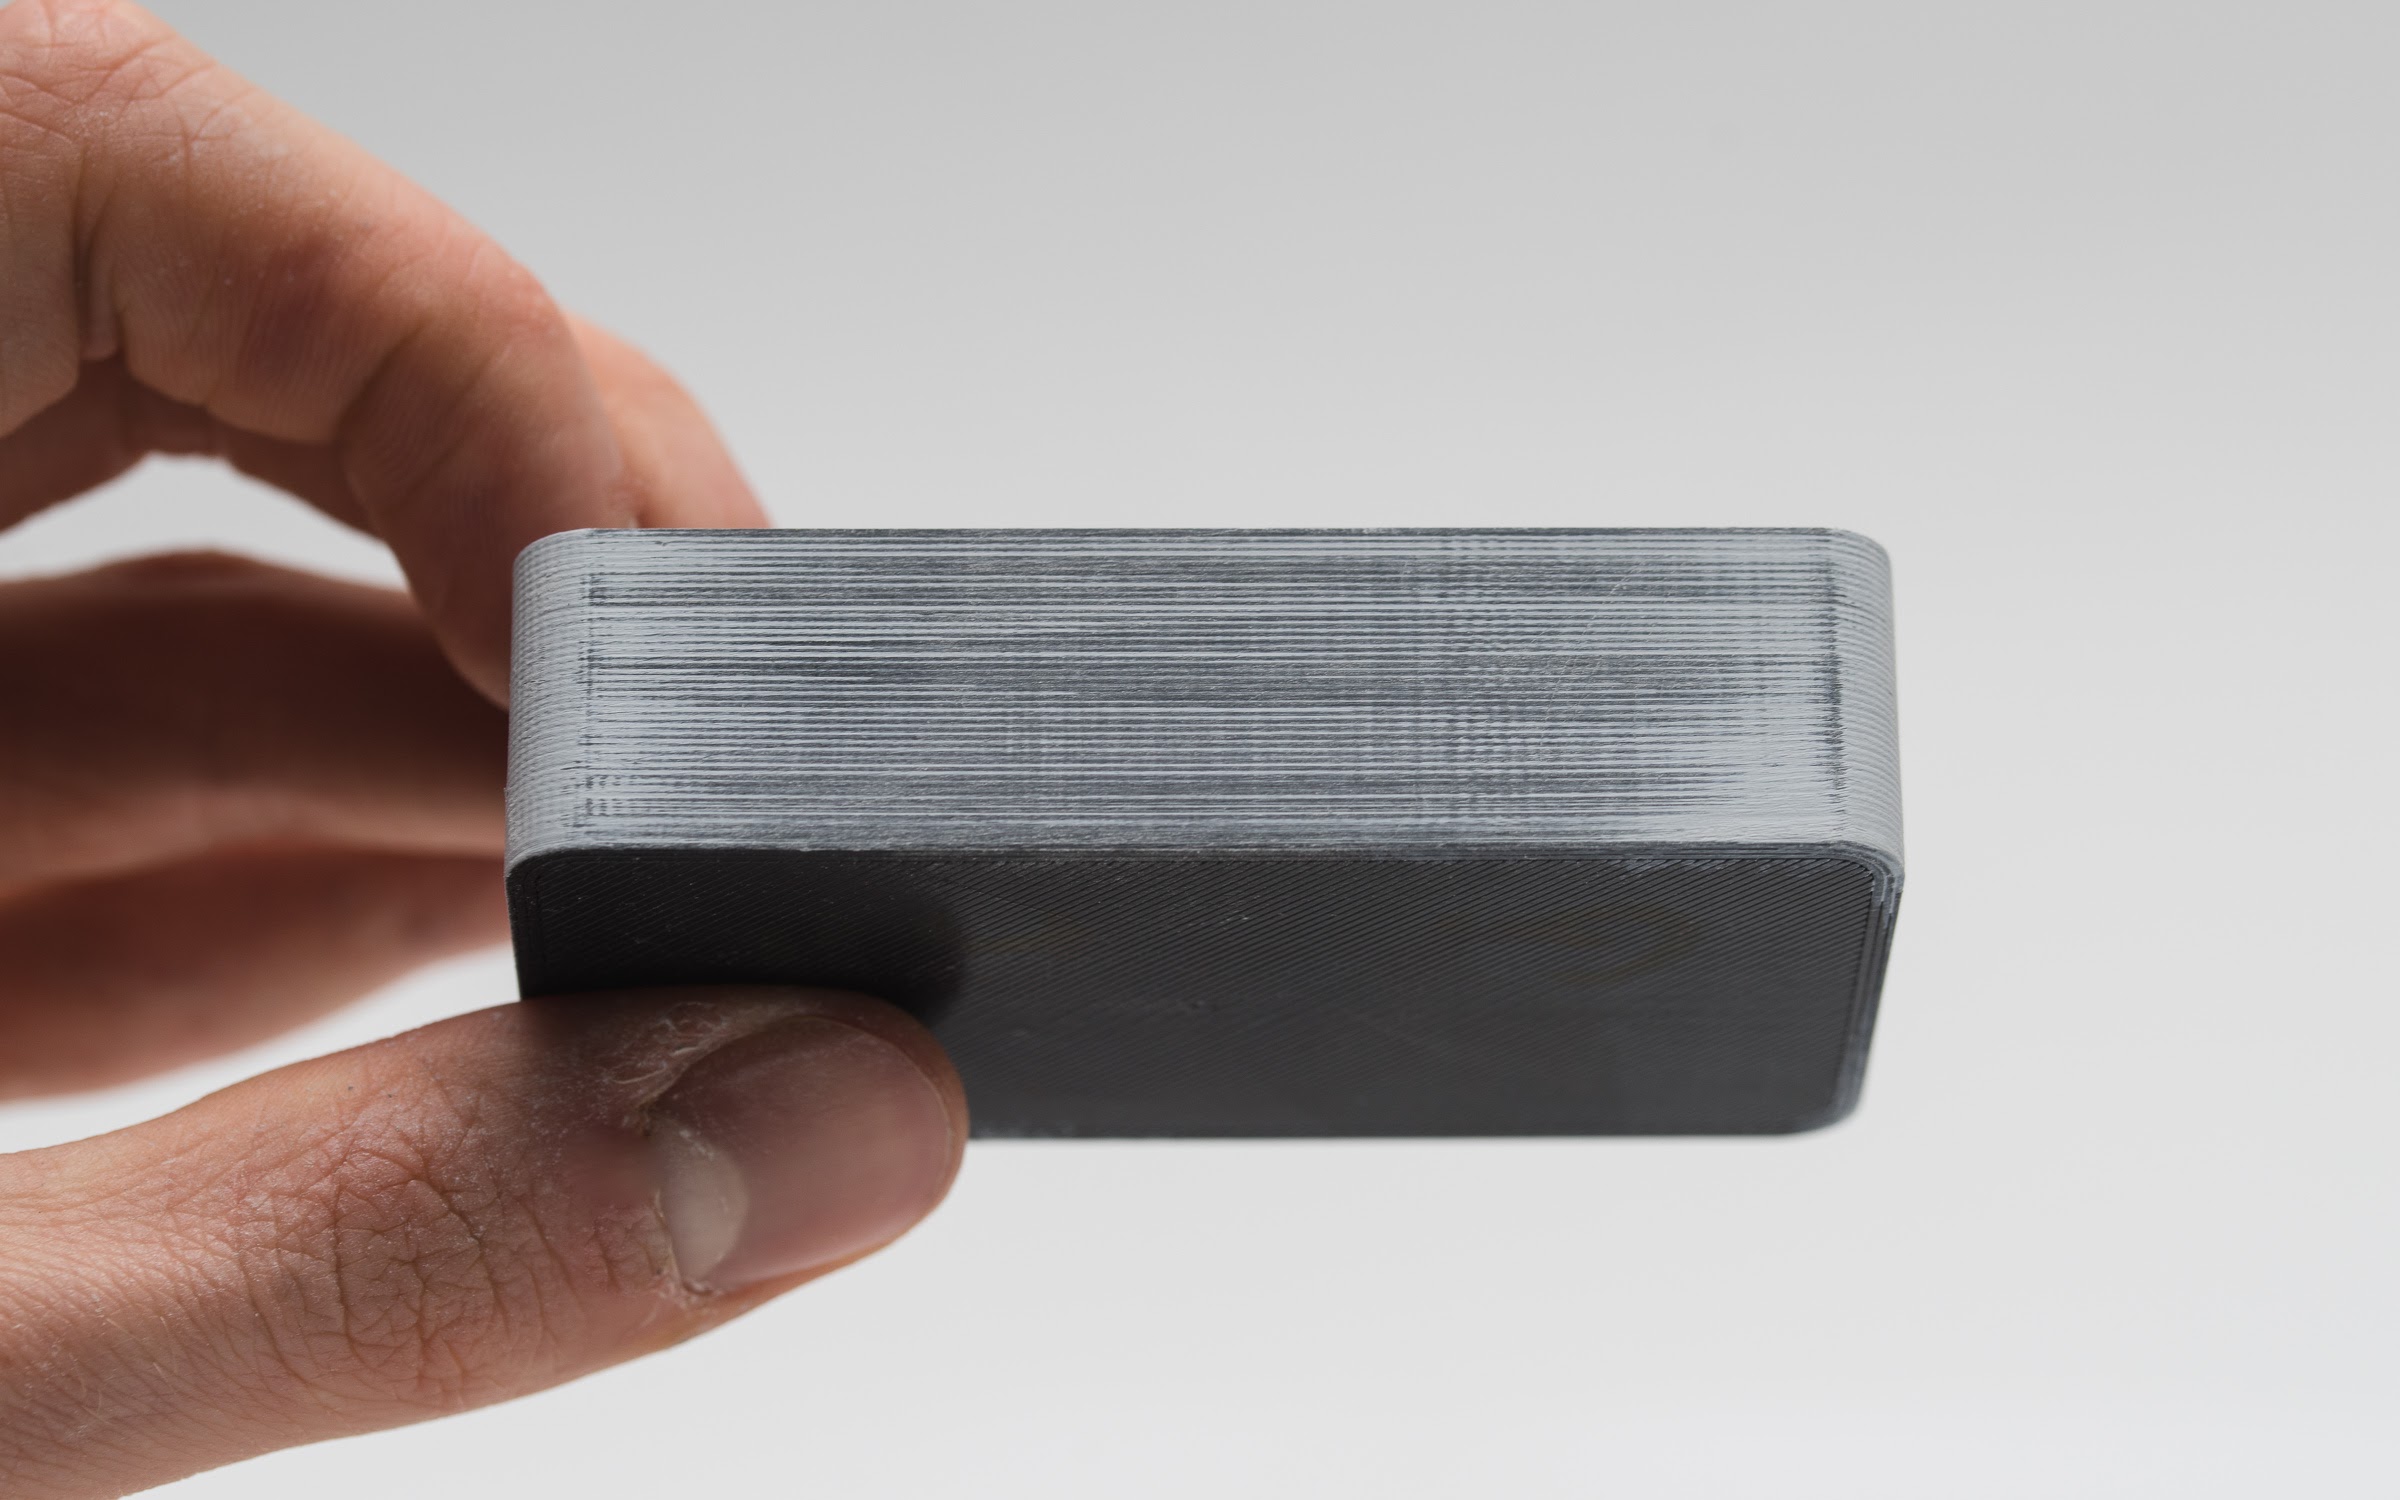
Process: After supports are removed or dissolved, sanding can be done to smooth the part and remove any obvious blemishes, such as blobs or support marks. The starting grit of sandpaper depends on the layer height and print quality; for layer heights of 200 microns and lower, or prints without blemishes, sanding can be started with 150 grit. If obvious blemishes are present, or the object was printed at a layer height of 300 microns or higher, start sanding with 100 grit.
Sanding should proceed up to 2000 grit, following common sanding graduations (one approach is to go from 220 grit to 400 grit, to 600 grit, to 1000 grit and finally 2000 grit). It is recommended to wet sand the print from start to finish, to prevent friction and heat build-up from damaging the part and keep the sandpaper clean. The print should be cleaned with a toothbrush and soapy water, then a tack cloth, between sanding gradations as well to prevent dust buildup and “caking”. FDM parts can be sanded up to 5000 grit to achieve and smooth, shiny finish.
Pro-tip: Always sand in small circular motions evenly across the surface of the part. It may be tempting to sand perpendicular to print layers, or even parallel to the print layers, but this can cause “trenches” to form the part. If the part discolors, or if there are many small scratches from sanding, a heat gun can be used to gently warm the print and soften the surface enough to “relax” some of the defects.
Pros
Cons
| Finish | ★ ★ ★ ★ ☆ |
| Tolerances | ★ ★ ★ ☆ ☆ |
| Speed | ★ ★ ☆ ☆ ☆ |
| Suitable for | All FDM thermoplastics |
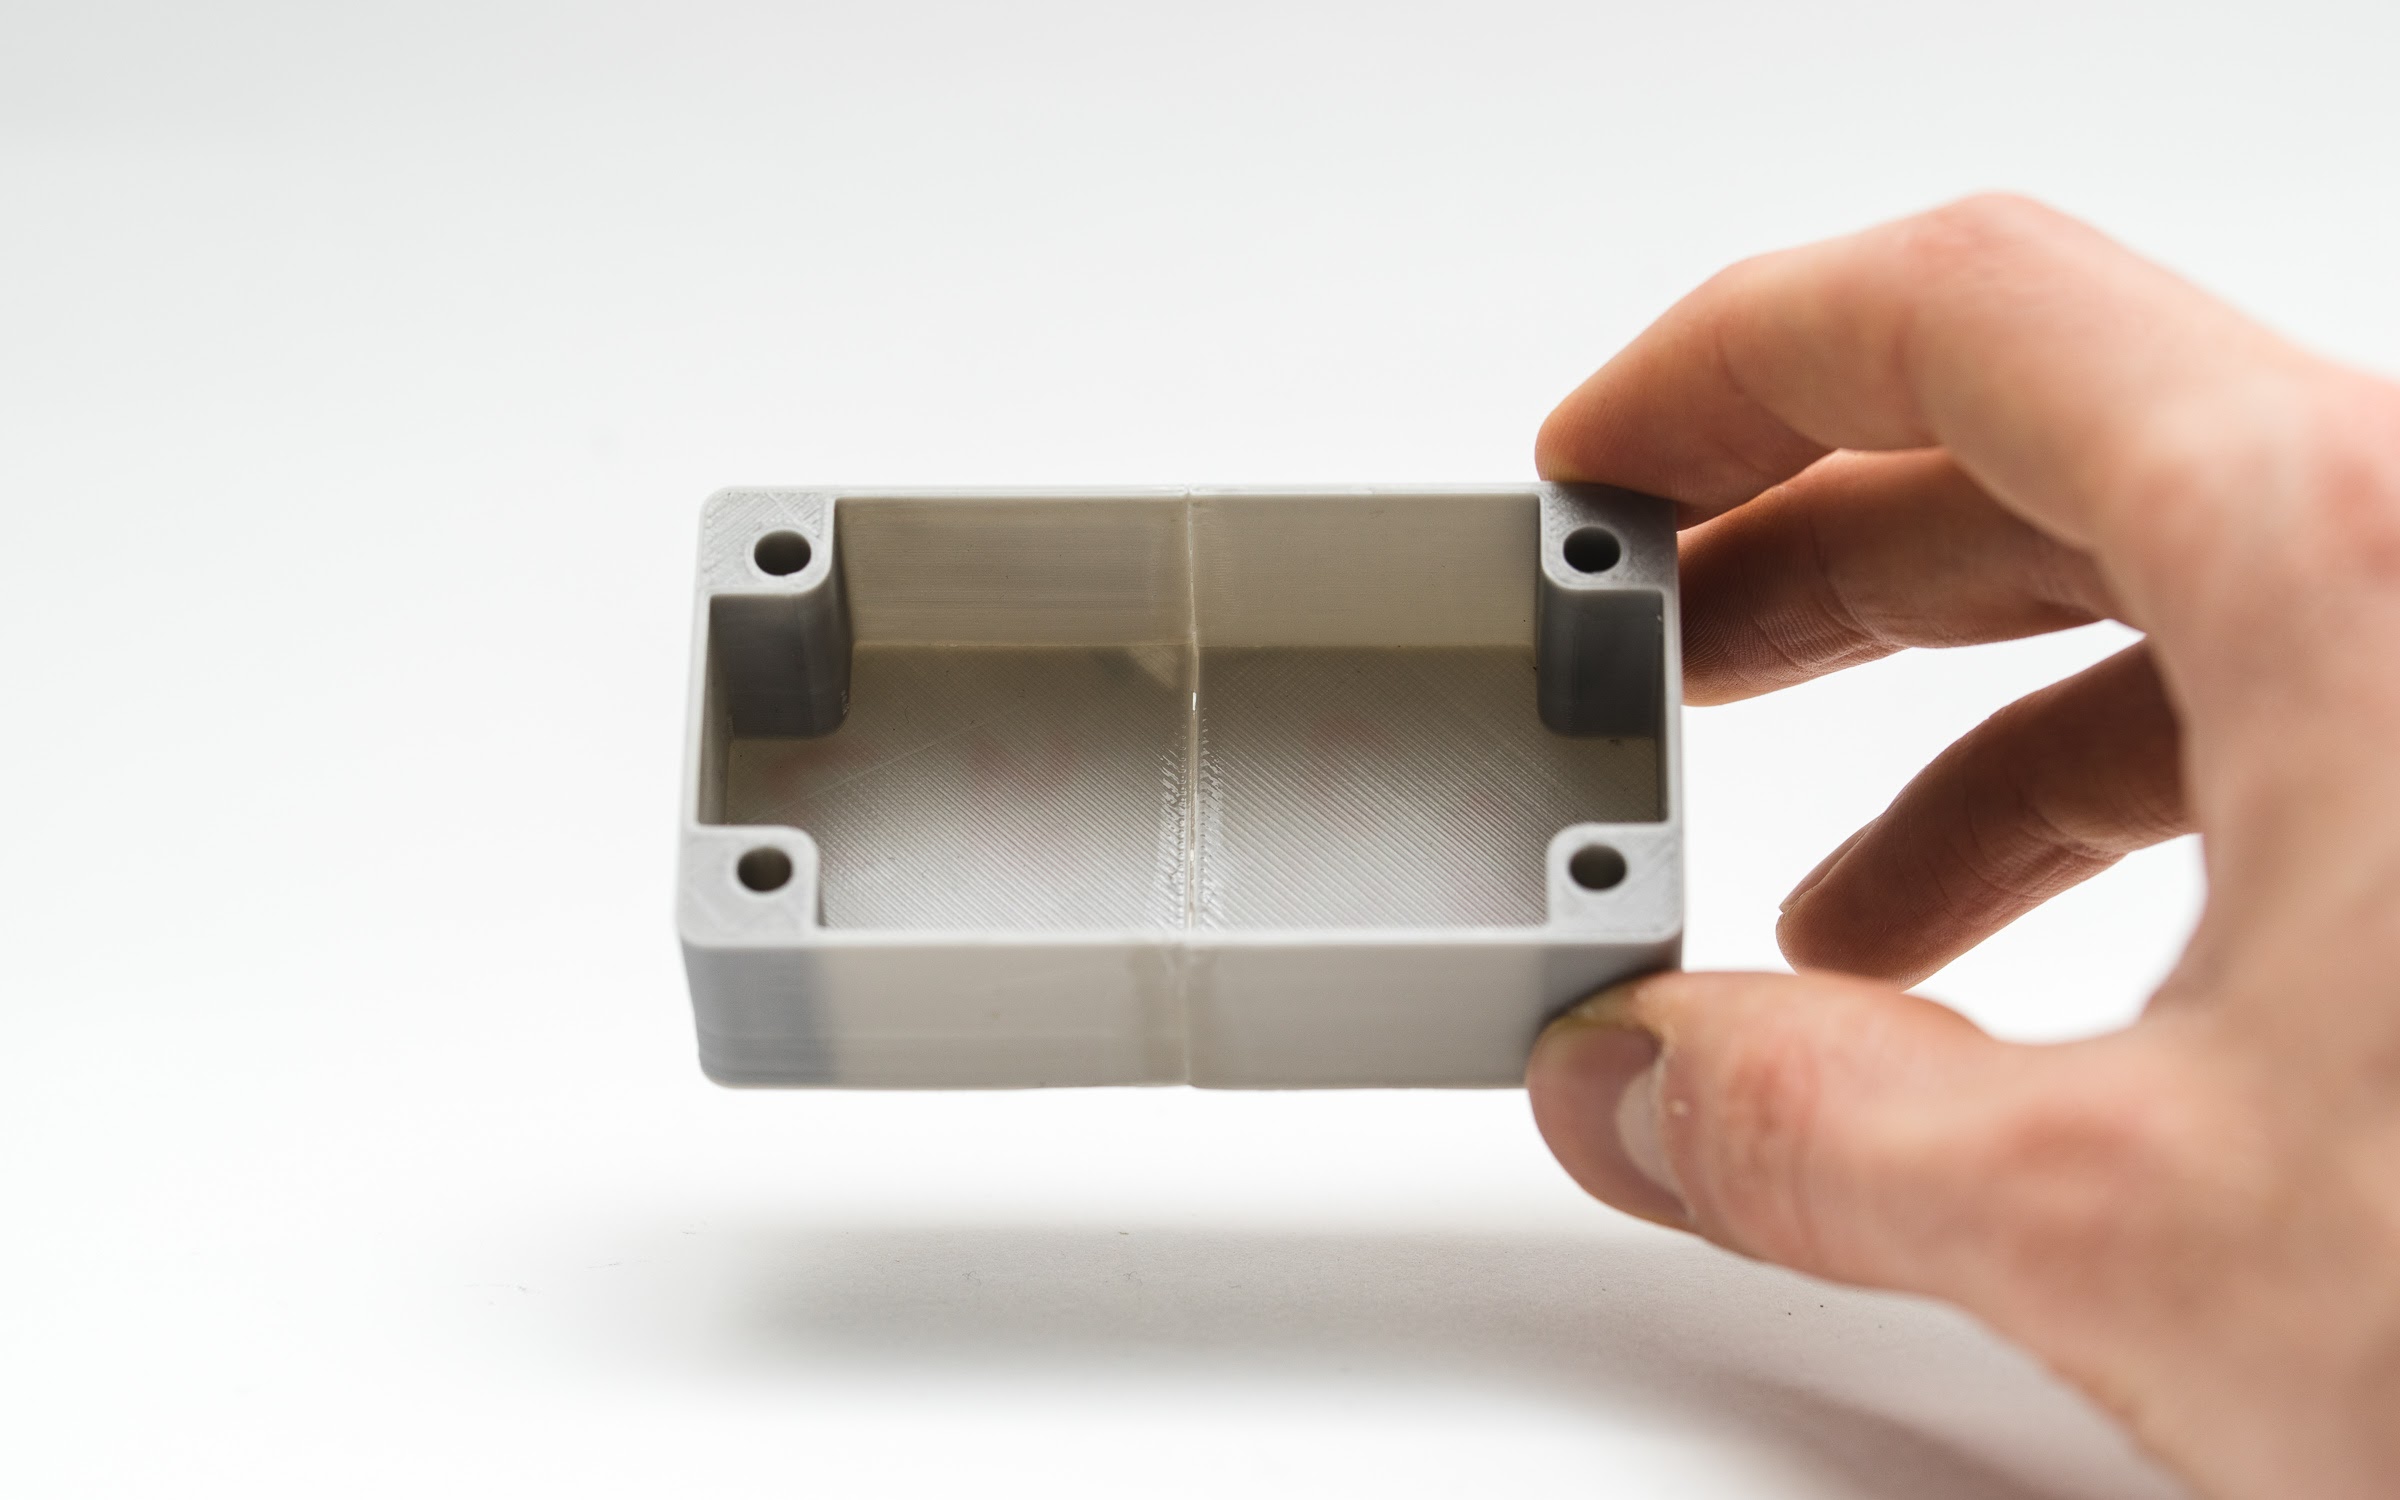
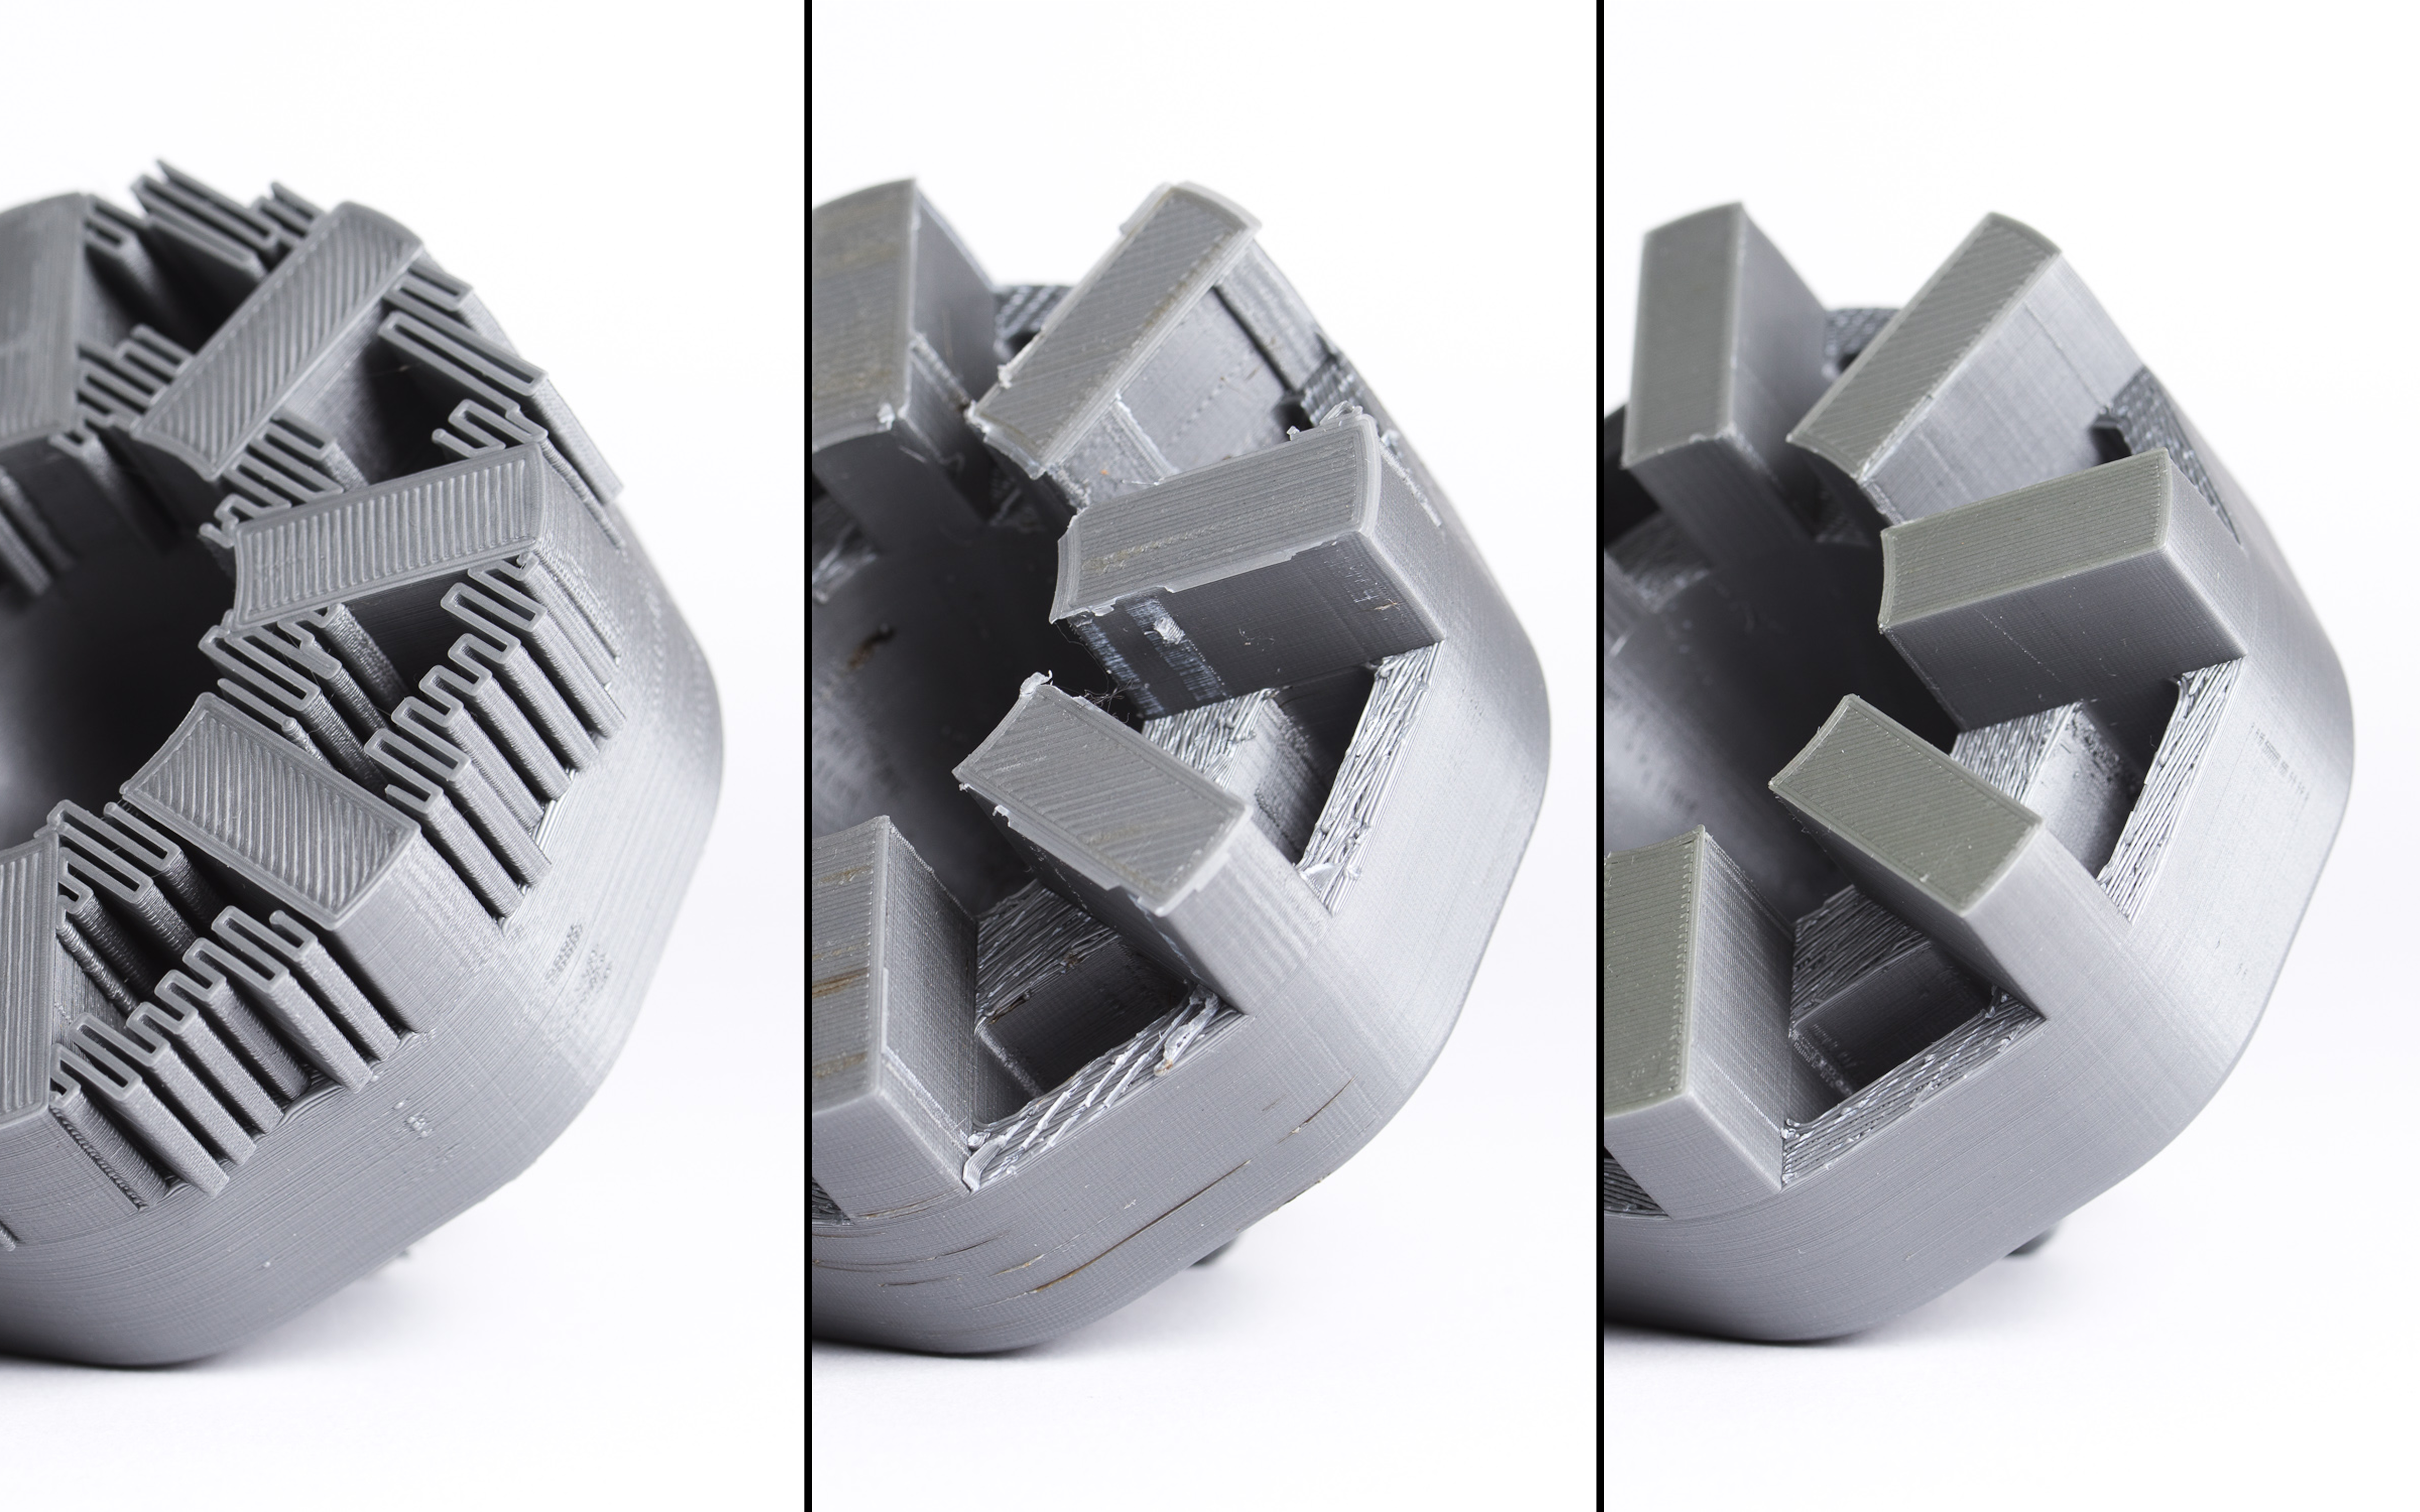
Process: When the size of a print exceeds the maximum volume of the printer, the design is often broken down into smaller sections and assembled together after printing. For PLA and other materials, assembly can be done using Bond-O or an appropriate glue (glue selection will depend upon plastic). For ABS, multi-part assemblies can be “welded” together using acetone. The mating surfaces need to be brushed lightly with acetone, and firmly held together, or clamped if possible, until the majority of the acetone evaporates. At this point, the two parts are chemically bonded to one another.
Pro-tip: Increasing the surface area the acetone contacts will increase the strength of the joint. This can be done by incorporating interlocking joints into the design.
Pros
Cons
| Finish | ★ ★ ☆ ☆ ☆ |
| Tolerances | ★ ★ ☆ ☆ ☆ |
| Speed | ★ ★ ★ ★ ★ |
| Suitable for | ABS |
Process: After sanding a print, or dissolving soluble supports, it is not uncommon for gaps to emerge on the print. During printing, gaps are formed when layers are incomplete due to toolpath constraints and are often inevitable. Small gaps and voids can easily be filled with epoxy (like XTC-3D), and may not require additional processing. Large gaps, or hollows left from joining a multi-print assembly, can be successfully filled with autobody filler which will require additional sanding once dry. Autobody filler makes an excellent filler, and can easily be sanded and painted once fully cured. It is also very strong, and will not weaken the plastic in the surrounding area; conversely, pieces joined with auto body filler or filled voids tend to be stronger than the native plastic.
Gaps in an ABS print can also be filled by creating a slurry of ABS filament and acetone, which chemically reacts with the ABS print and seeps into any voids in the surface. A ratio of 1 part ABS to 2 parts acetone is recommended, and will not significantly impact the surface finish around the gap if applied properly.
Pro-tip: If gaps are apparent in the print before sanding, fill the spaces with Bond-O or epoxy then sand once dry. This will greatly reduce the total amount of time required to achieve a smooth surface.
Pros
Cons
| Finish | ★ ★ ☆ ☆ ☆ |
| Tolerances | ★ ★ ★ ☆ ☆ |
| Speed | ★ ★ ★ ☆ ☆ |
| Suitable for | All FDM thermoplastics |
Process: After sanding a print, a plastic polish can be applied to give standard thermoplastics, like ABS and PLA, a mirror-like surface finish. Once the print is sanded up to 2000-grit, wipe excess dust off the print with a tack cloth then clean the print in warm water bath with a toothbrush. Allow the print to dry fully, and buff using a buffing wheel or by hand with a microfibre cloth and plastic polishing compound, such as Blue Rouge. Blue Rogue is a type of jeweller’s polish, designed specifically for plastic and synthetics and produces a long-lasting surface shine. Other plastic polishes, such as those for vehicle headlights, work as well but some may include chemicals that can damage the print material.
Pro-tip: Attach a buffing wheel to a variable speed Dremel (or another rotary tool, like a power drill) for polishing small prints. A bench grinder fitted with a buffing wheel can be used for larger more robust prints, but ensure the print does not stay in one place for too long. This can cause the plastic to melt, due to friction.
Pros
Cons
| Finish | ★ ★ ★ ★ ★ |
| Tolerances | ★ ★ ★ ☆ ☆ |
| Speed | ★ ★ ☆ ☆ ☆ |
| Suitable for | All FDM thermoplastics |
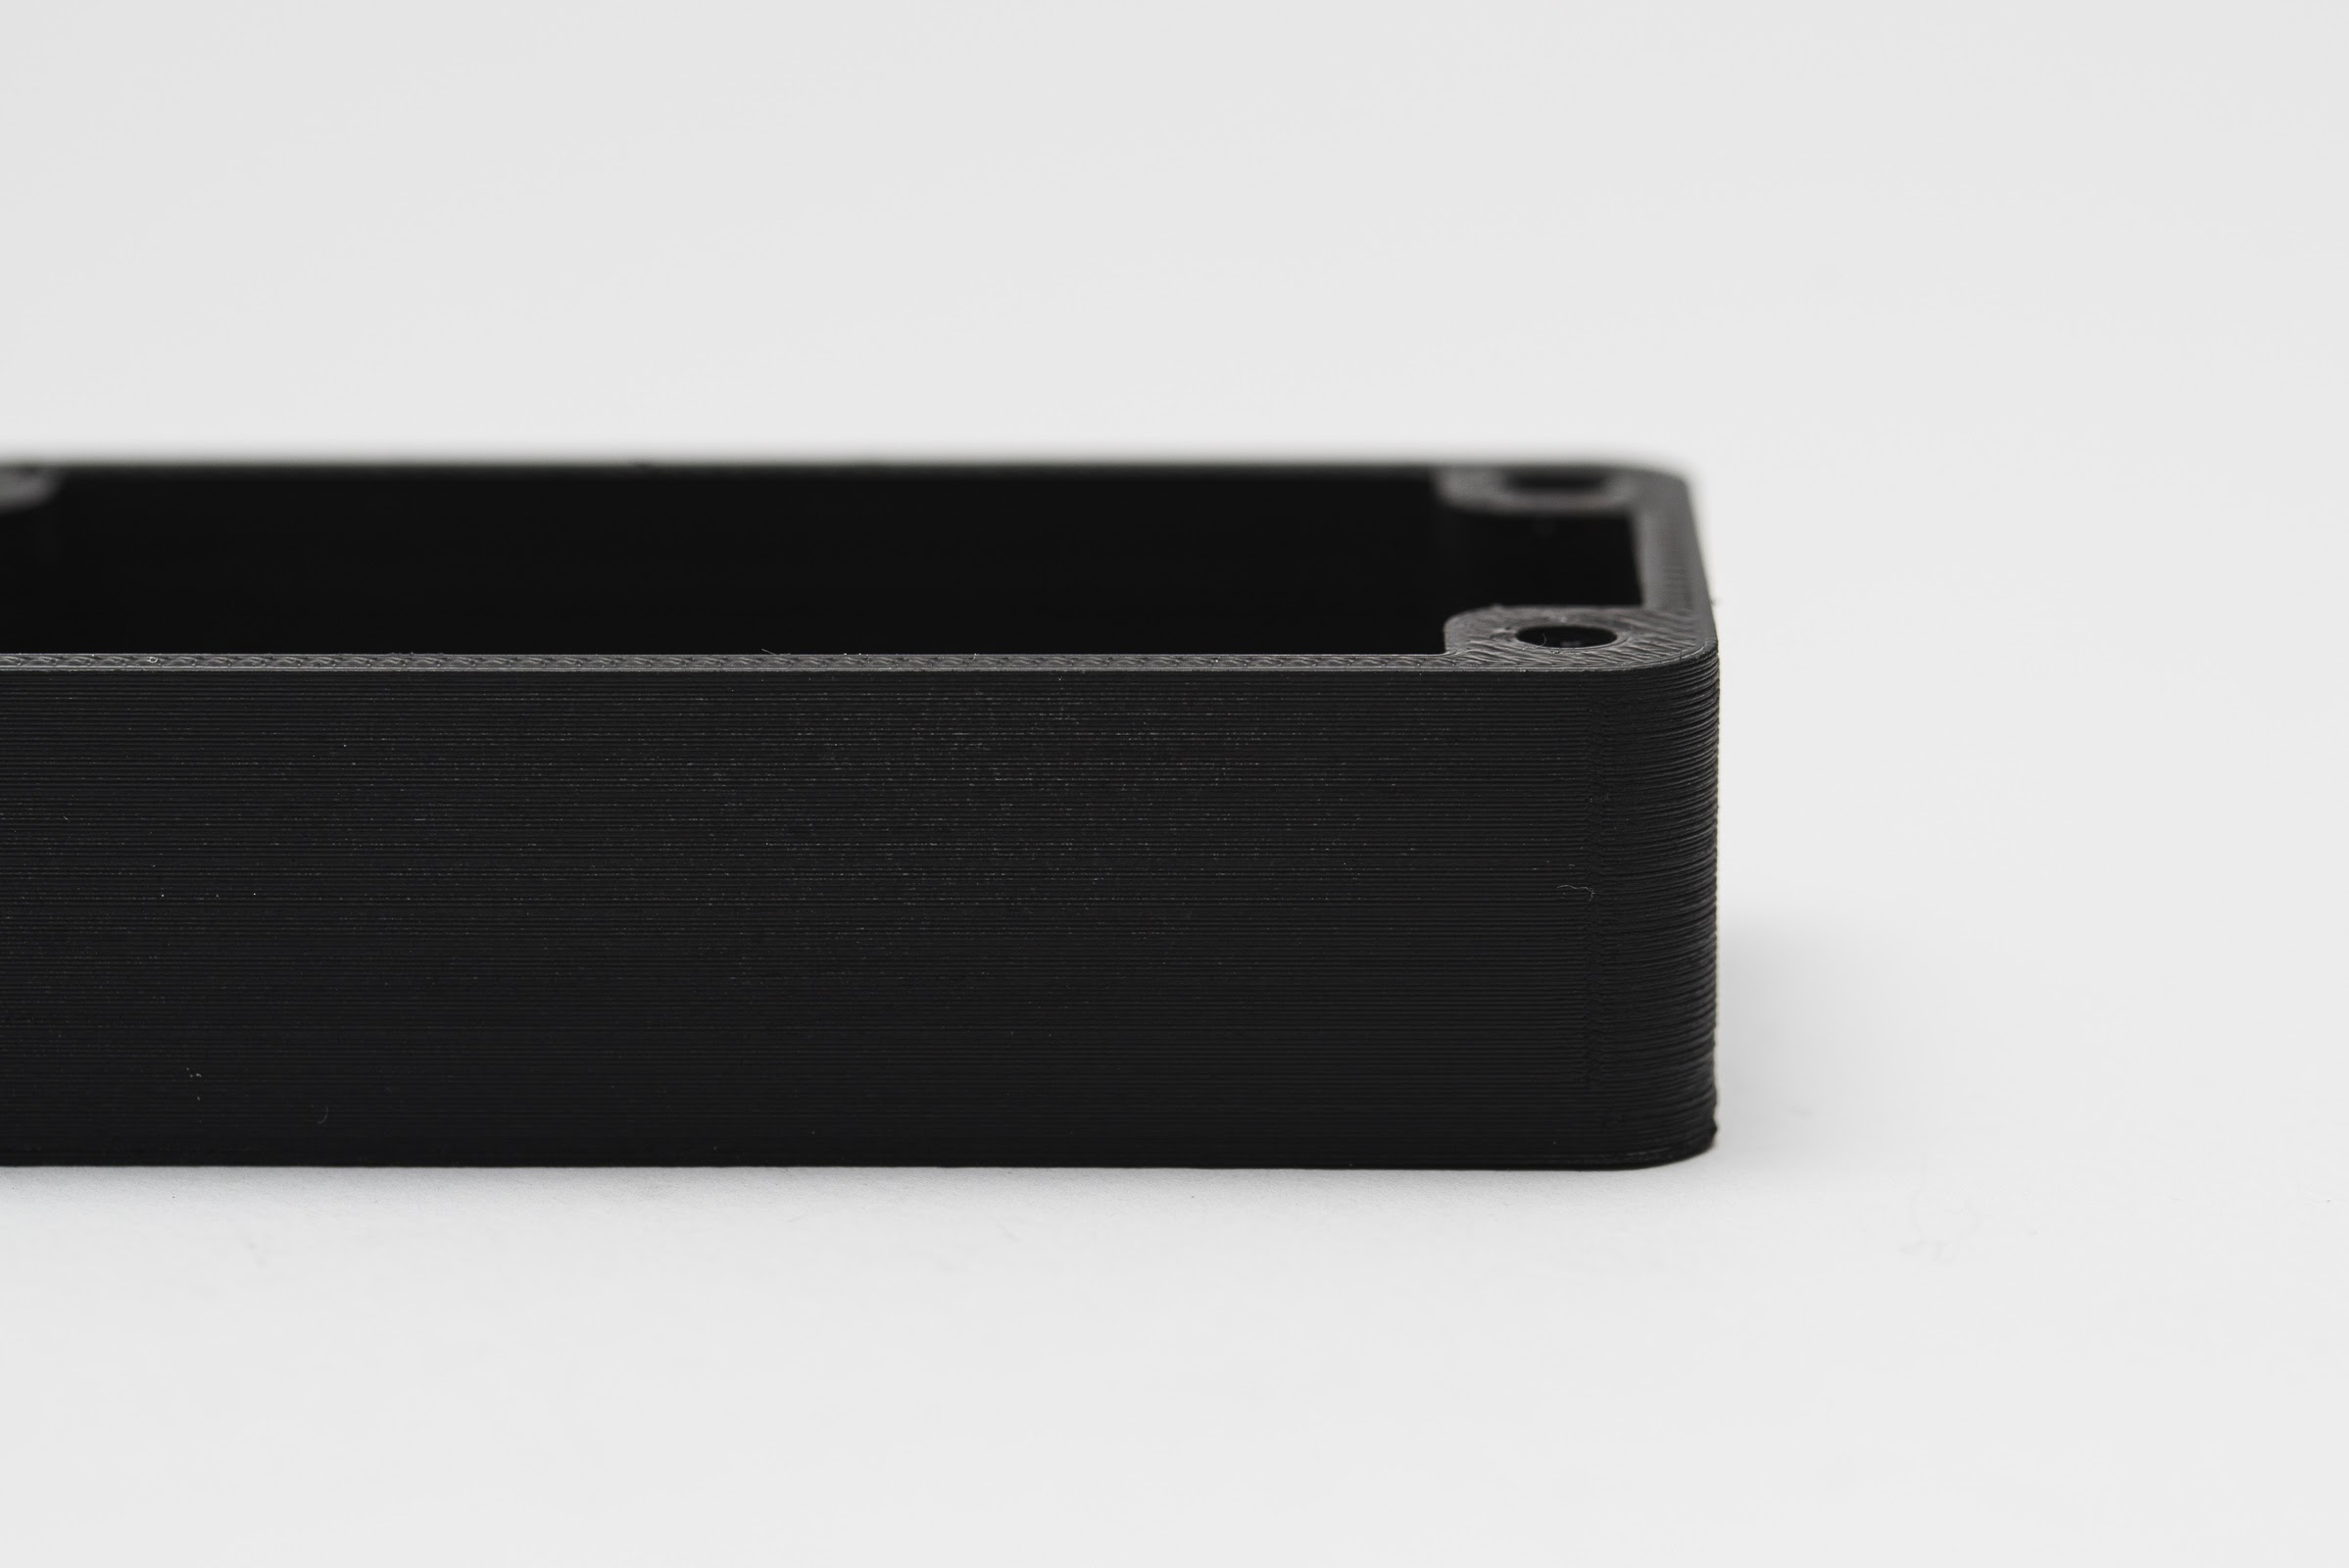
Process: Once the print is properly sanded (only need to go up to 600 grit for painting), the print can be primed. Priming should be done in two coats, using an aerosol primer. An aerosol primer designed for model painting will provide even coverage, and be thin enough to ensure details of the print are not obscured before painting begins. Thick primer, such as what can be purchased at a hardware store, may clump and require significant sanding. Spray the first coat in short quick strokes, approximately 15 - 20 cm away from the part, to avoid pooling of the primer. Allow the primer to dry, and sand any imperfections with 600 grit sandpaper. Apply the final coat of primer in light quick strokes, again being very careful to prevent pooling.
Once priming is complete, painting can begin. Painting can be done with artist acrylic paints and brushes, but the use of an airbrush or aerosol can will provide a smoother surface finish. Spray paint from a hardware store is thicker in viscosity, and more difficult to control, so paints designed specifically for model painting should be used. The primed surface should be buffed and polished (buffing and polishing sticks used by nail salons can be purchased online, and work perfectly for this application) then cleaned using a tack cloth. Paint the model using very light coats; the first few layers will look translucent. Once the paint forms an opaque layer (generally after 2-4 layers), allow the model to sit for 30 minutes so the paint can set. Gently polish the paint layer with the nail sticks, and follow this process for each desired color (polishing between every layer of paint).
Sections of the model can be masked with painter’s tape to preserve the undercoat color if desired. Once all paint layers are complete, remove the masks and polish the paint using polishing paper. Polishing paper, such as 3M’s or Zona’s, can be purchased in different grits and is a relatively new product. It can be purchased as a pack from many online retailers and gives paint, as well as top-coats, a shine that can otherwise not be easily achieved. Apply 1-2 layers of a topcoat to protect the paint, and allow to dry fully. The topcoat should be chosen in accordance with the recommendations of the manufacturer of the paint used. Incompatible topcoat and paint layers can ruin the paint job, so it is very important compatibility is assured here.
Pro-tip: When using aerosol paint, do not shake the can! The goal is to mix the pigment or primer without shaking up the propellant, which will result in bubbles in the spray. Instead, swirl the can for 2-3 minutes; the mixing bead should roll like a marble instead of rattling.
Pros
Cons
| Finish | ★ ★ ★ ★ ★ |
| Tolerances | ★ ★ ★ ☆ ☆ |
| Speed | ★ ☆ ☆ ☆ ☆ |
| Suitable for | All FDM thermoplastics |
Process: Line the chosen container with paper towels along the bottom, and up the sidewalls if possible. It is critical that the vapor will not compromise the chamber itself, and the chamber can be sealed. Glass and metal containers are recommended. Pour in enough solvent to dampen, but not soak, the paper towels; this should also help the towels adhere to the sidewalls of the container. Acetone is well-known for it’s abilities to smooth ABS. For PLA, smoothing is possible with different solvents (THF or MEK work decently) but it is generally more difficult to get a smoothed surface when compared to ABS. When working with any solvent, please check the safety regulations on the chemical and always use appropriate safety precautions. A small “raft” of aluminum foil, or other solvent proof material, should be placed in the middle of the paper towel lined container. Place the print on the raft (with whatever side has been chosen as the bottom resting on the raft), and close the lid of the container. Vapor polishing will take a variable amount of time, so check the print periodically. Heat can be used to increase the speed the polishing occurs at, but care must be taken to prevent the buildup of potentially explosive vapor.
When removing the print from the chamber, try to avoid touching the print at all by leaving the print on the raft, and removing both from the container. Any points where the print has been contacted will have surface imperfections, as the outer shell will be semi-dissolved. Allow the print to fully off-gas any remaining solvent before handling.
NOTE: Many aerosolized and/or atomized solvents are flammable/explosive, and solvent vapor can be harmful to human health. Take extreme care if heating solvents, and always smooth prints/store solvent in a well-ventilated space.
Pros
Cons
| Finish | ★ ★ ★ ★ ☆ |
| Tolerances | ★ ★ ☆ ☆ ☆ |
| Speed | ★ ★ ★ ☆ ☆ |
| Suitable for | ABS (sometimes PLA) |
Process: Ensure that the container to be used is wide enough and deep enough to accommodate the print and the solvent. Fill the container with an appropriate amount of solvent, being careful to minimize any splashing. As with vapor smoothing, acetone should be used for dipping ABS, and MEK or THF can be used to dip PLA. PLA is fairly resistant to solvent smoothing so it may take several attempts to achieve the desired result. Prepare the print for dipping by screwing an eye hook or small screw into an inconspicuous surface of the print. Loop the wire through the eye of the hook, or around the screw, so that the print can be lowered into the bath using the wire. If the wire is too thin of a gauge, it will not be able to counteract the buoyancy of the print and make proper dipping very difficult.
Once the print is prepped, quickly submerge the entire object in the solvent for no more than a few seconds using the wire. Remove the print and hook the wire over a drying rod or rack to allow the solvent to fully evaporate from the surface. The print can be gently shaken after removal to facilitate drying, and ensure no solvent pools in recesses on the surface.
Pro-tip: If once dry, the print has an opaque white-ish color, it can be suspended over the solvent bath for some time to allow the evaporating solvent vapor to slightly dissolve the surface. This will restore the print’s color and ensure a shiny outer layer.
Pros
Cons
| Finish | ★ ★ ★ ★ ☆ |
| Tolerances | ★ ☆ ☆ ☆ ☆ |
| Speed | ★ ★ ★ ★ ☆ |
| Suitable for | ABS (sometimes PLA) |
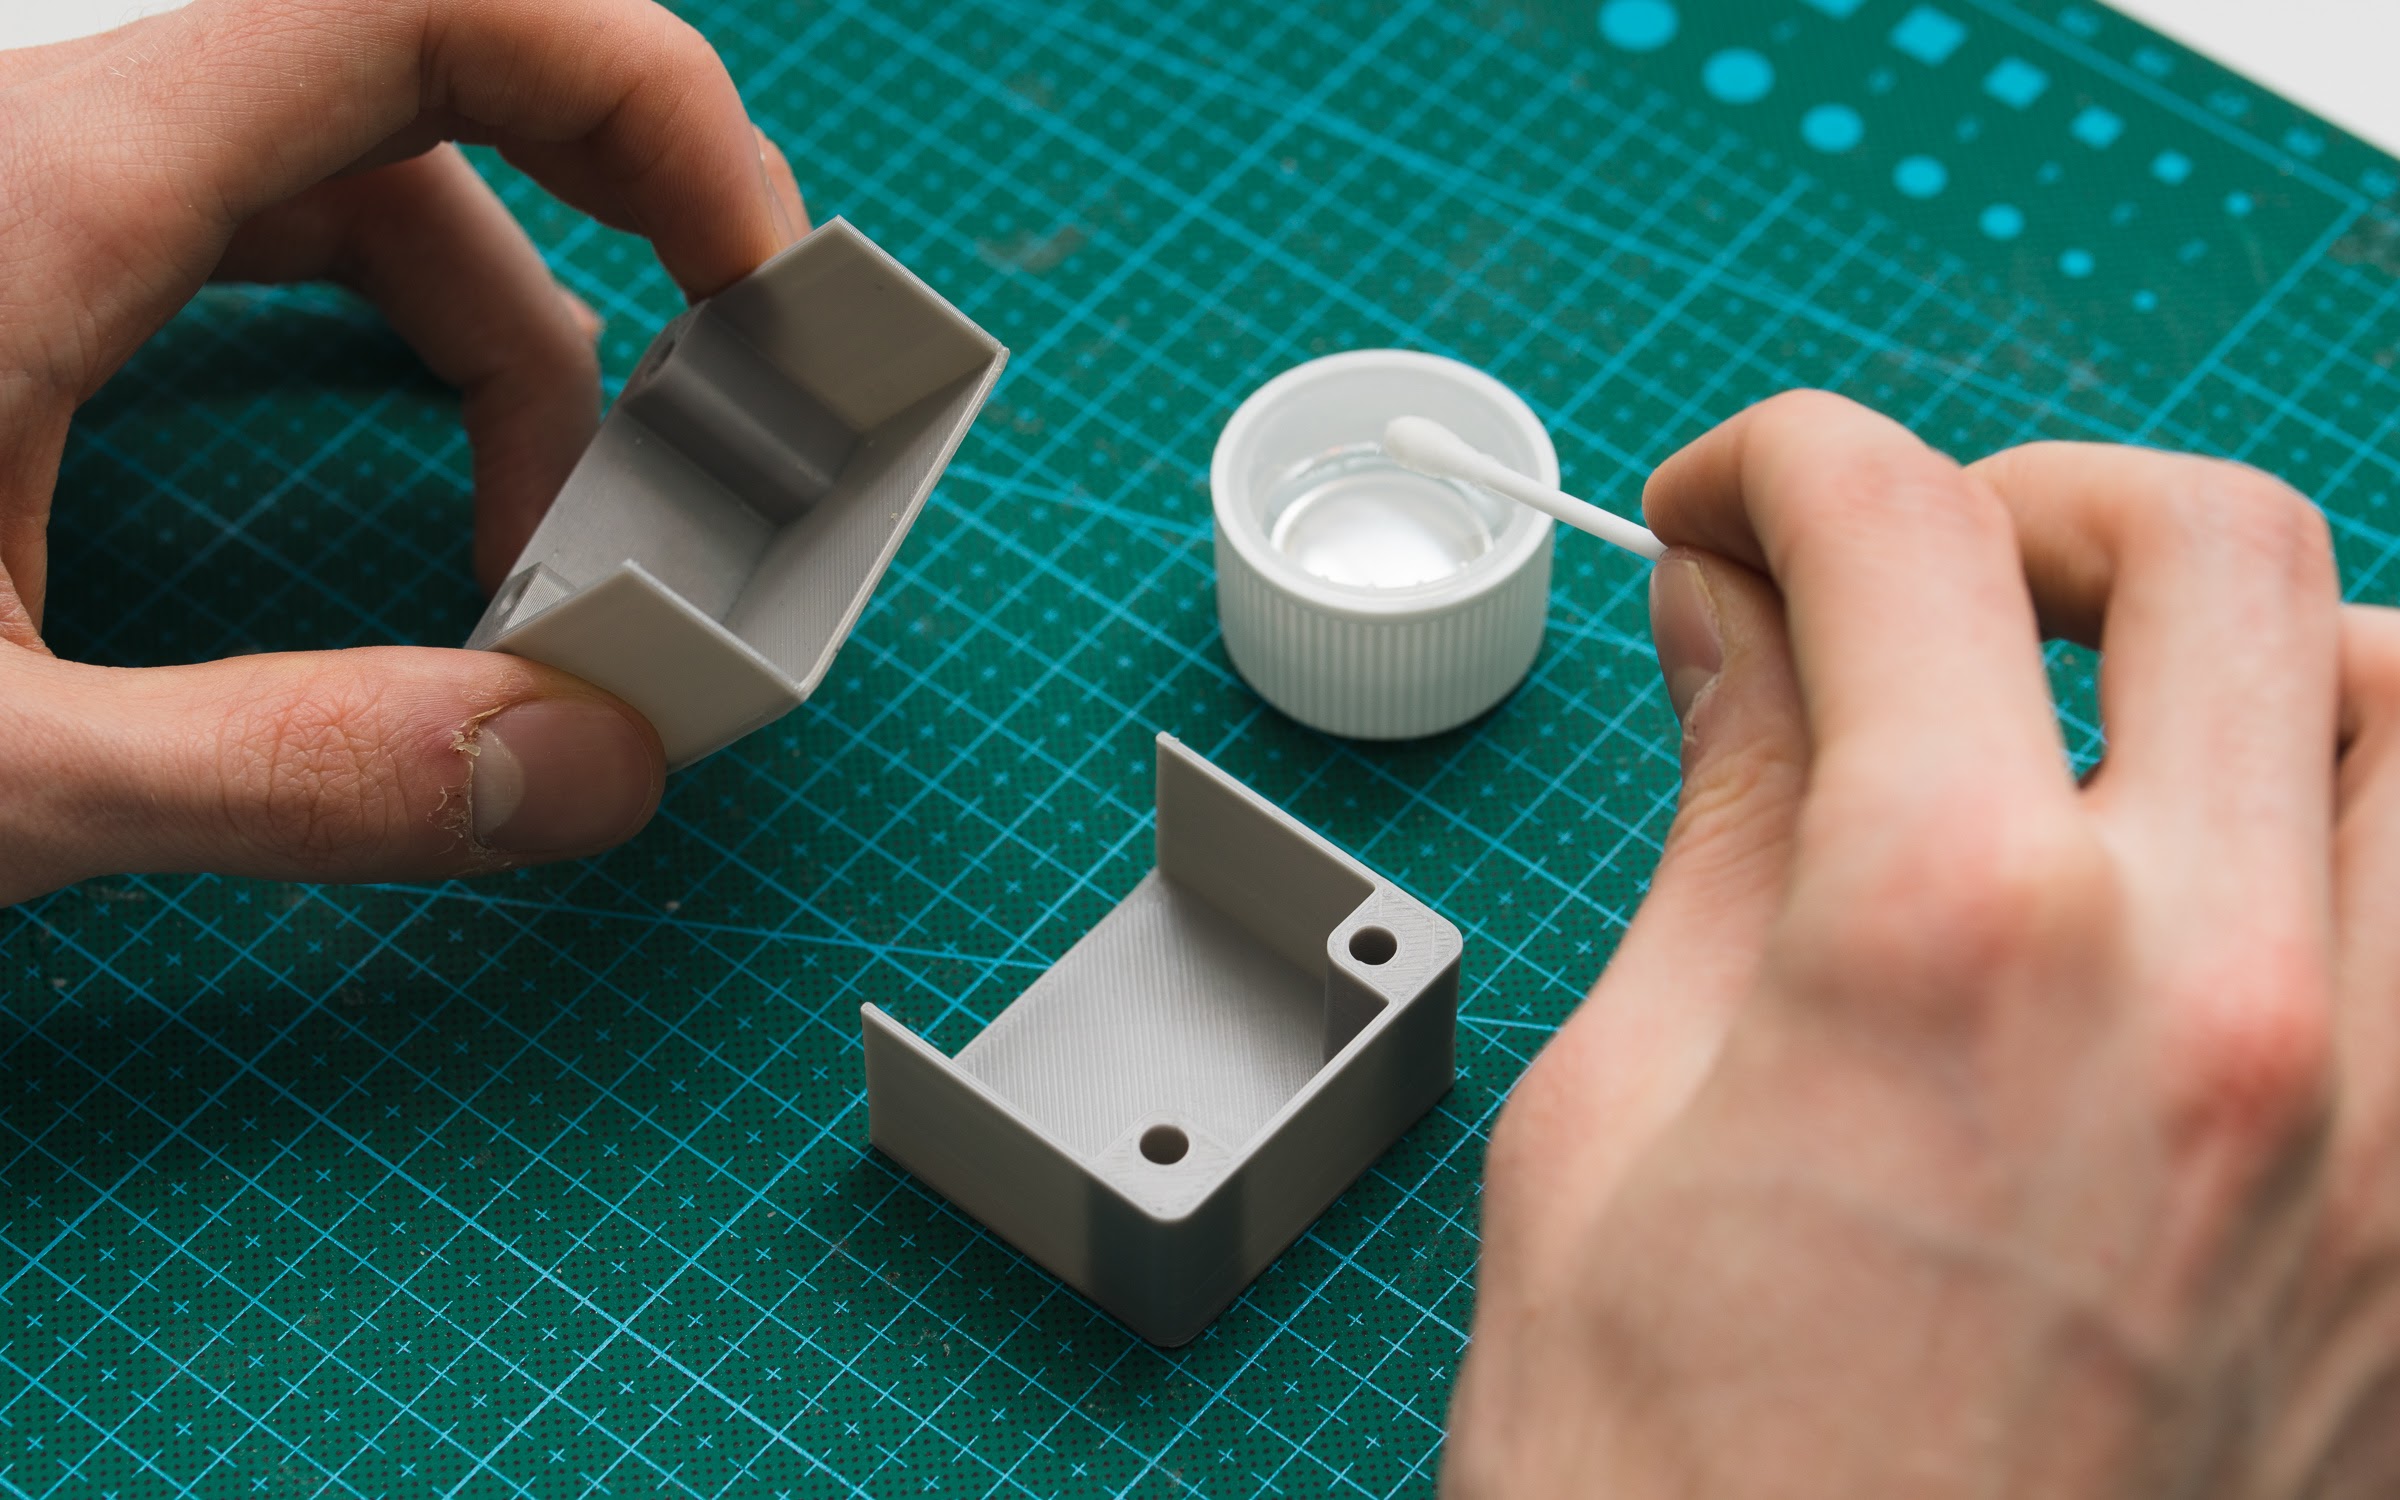
Process: Once the print is sanded (sanding first will produce better final results), fully clean the print with a tack cloth. Mix the appropriate ratio of resin to hardener as specified on the instructions for the resin, ensuring everything is measure precisely. Epoxy resins are exothermic when mixed, so glass containers and containers composed of materials with low melting points should be avoided. Containers specifically designed for mixing epoxy resins are recommended. Improper ratios will increase drying time, and the epoxy may never fully cure, resulting in a “tacky” finish. XTC-3D is a specialized coating designed for 3D printing, but any 2-part epoxy resin will work well for this application as long as it is prepared properly. Thoroughly mix the resin and the hardener as per the instructions using smooth revolutions, to minimize the number of air bubbles introduced to the system. A little epoxy goes a long way, and most epoxies only have a working time of 10-15 minutes so plan accordingly.
Apply the first coat of the epoxy using a foam applicator, and try to minimize pooling on any recessed surfaces or details of the print. Once the print has been sufficiently coated, allow the epoxy to fully cure as per manufacturer instructions. A first coat may be sufficient to smooth the print, but for an optimal finish, the print should be lightly sanded with fine sandpaper (1000 grit or higher) to remove any imperfections. Remove any dust with a tack cloth, and apply a second coat of epoxy, following the same procedure.
Pros
Cons
| Finish | ★ ★ ★ ★ ☆ |
| Tolerances | ★ ☆ ☆ ☆ ☆ |
| Speed | ★ ★ ★ ★ ☆ |
| Suitable for | All FDM thermoplastics |
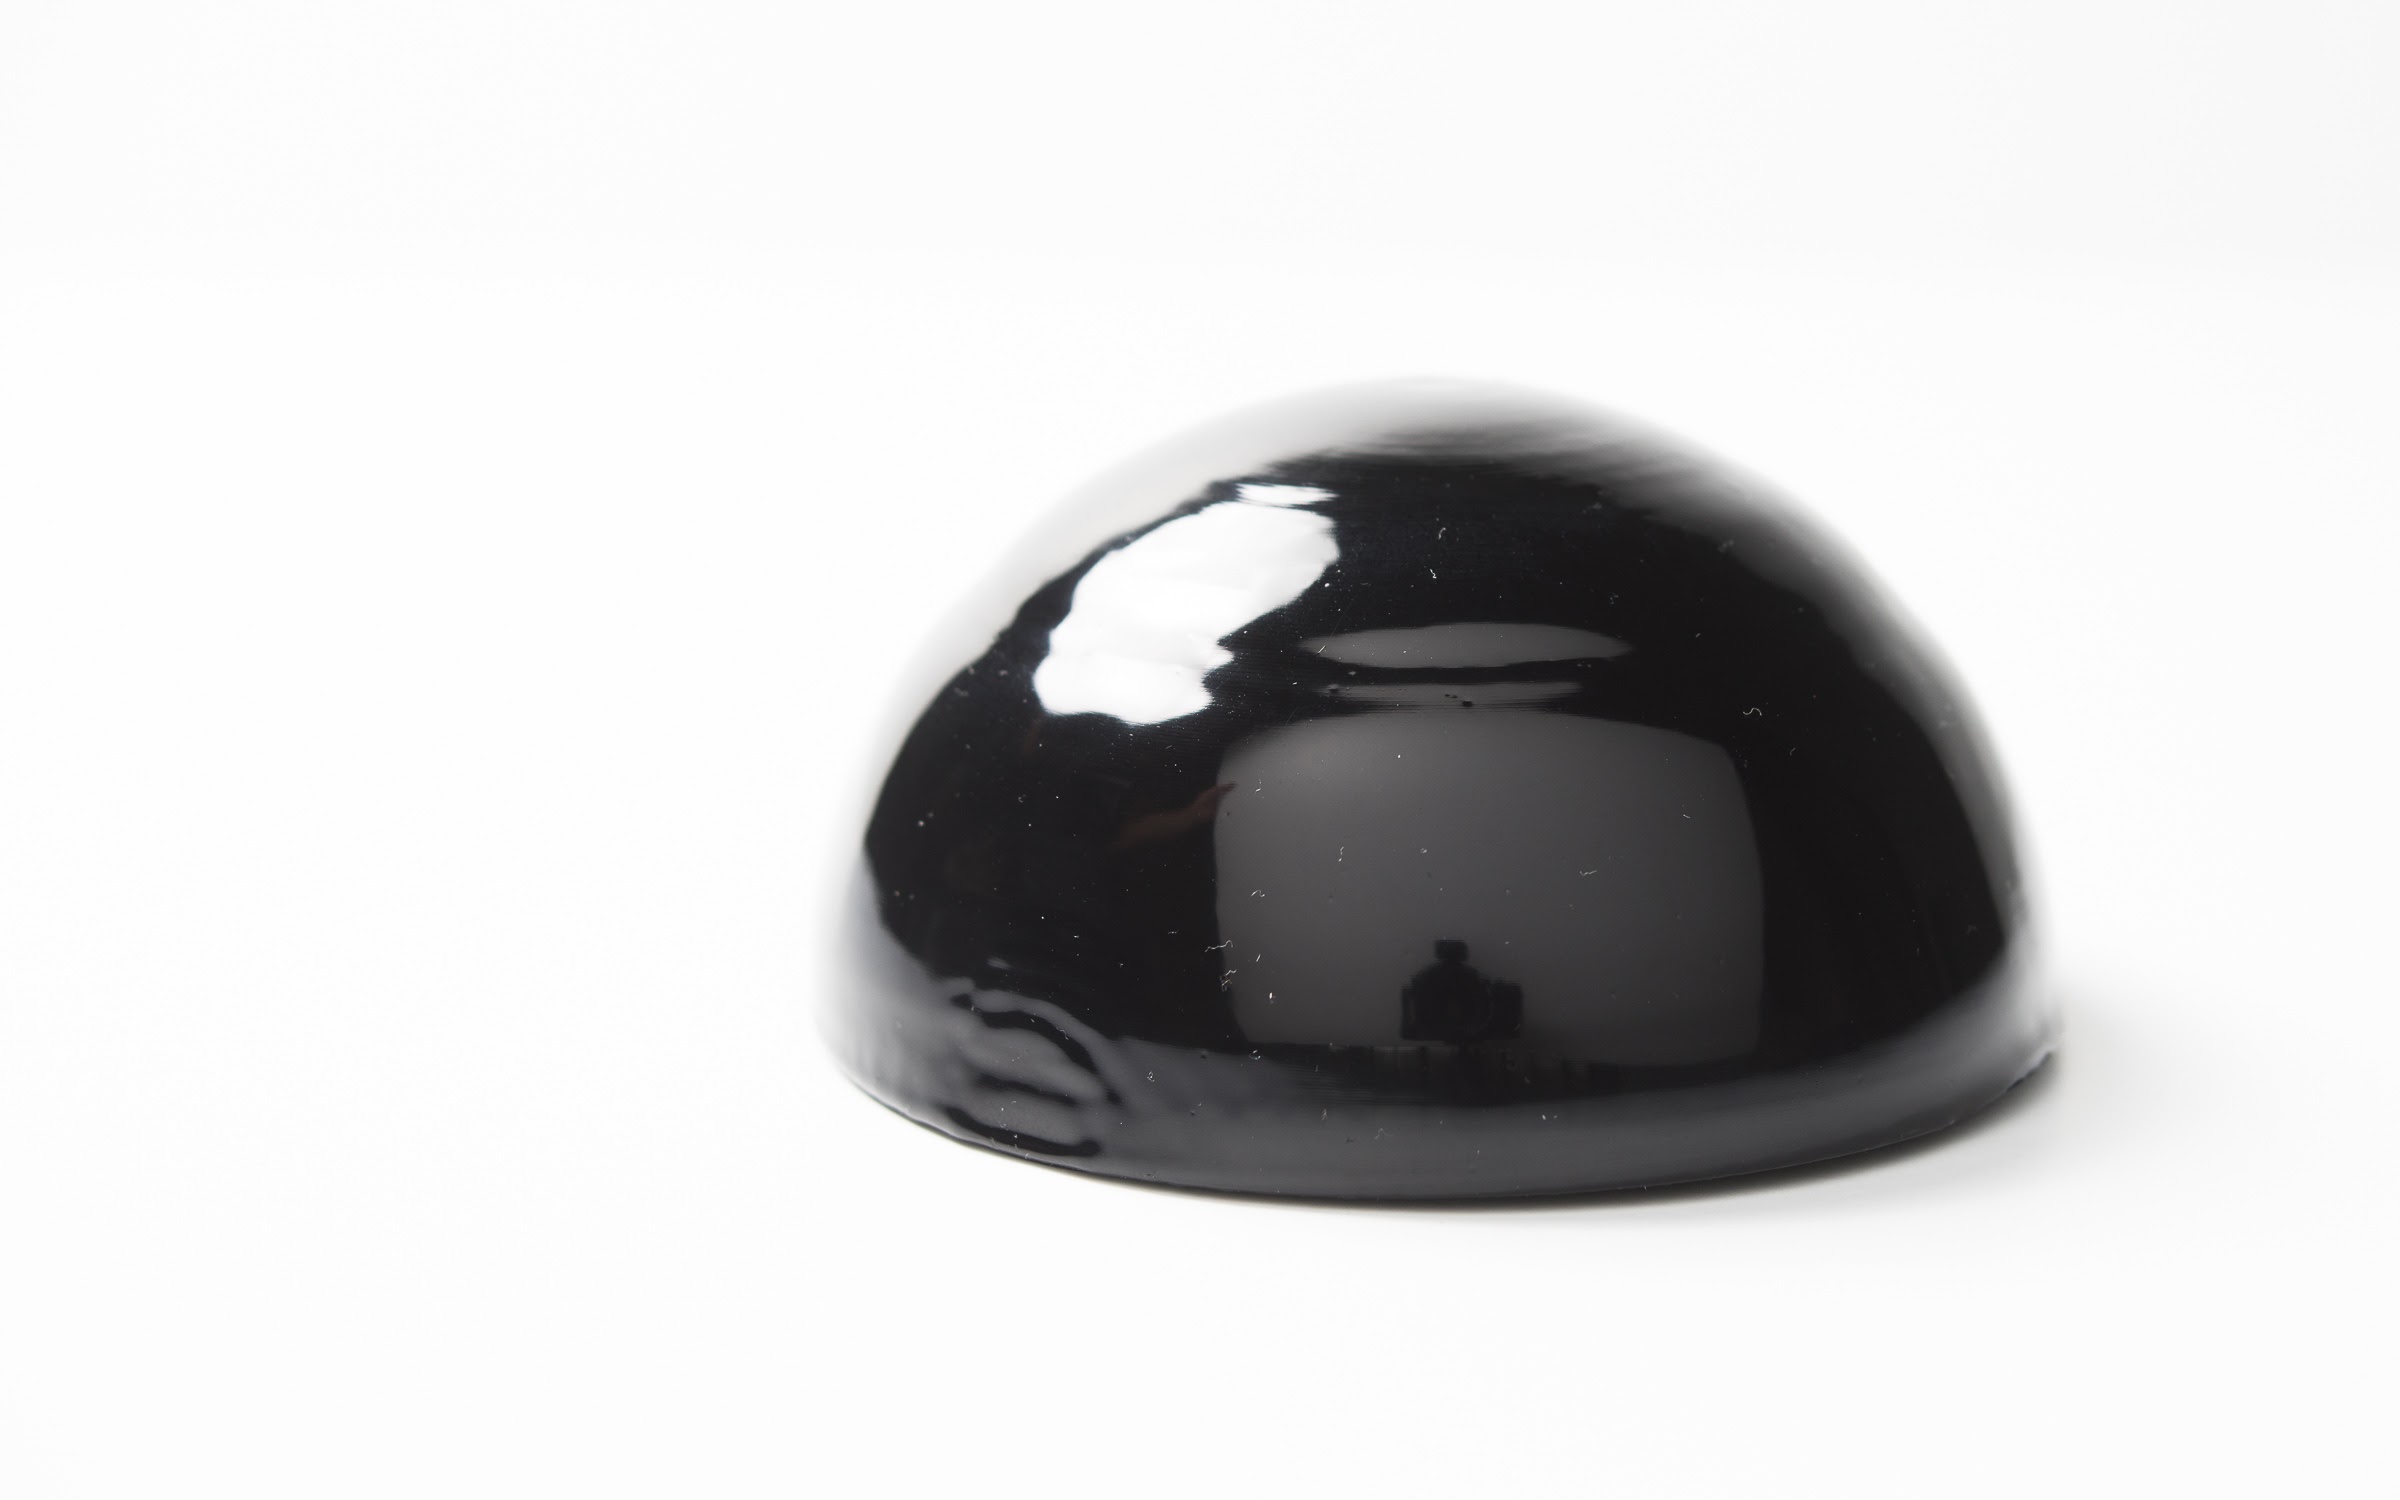
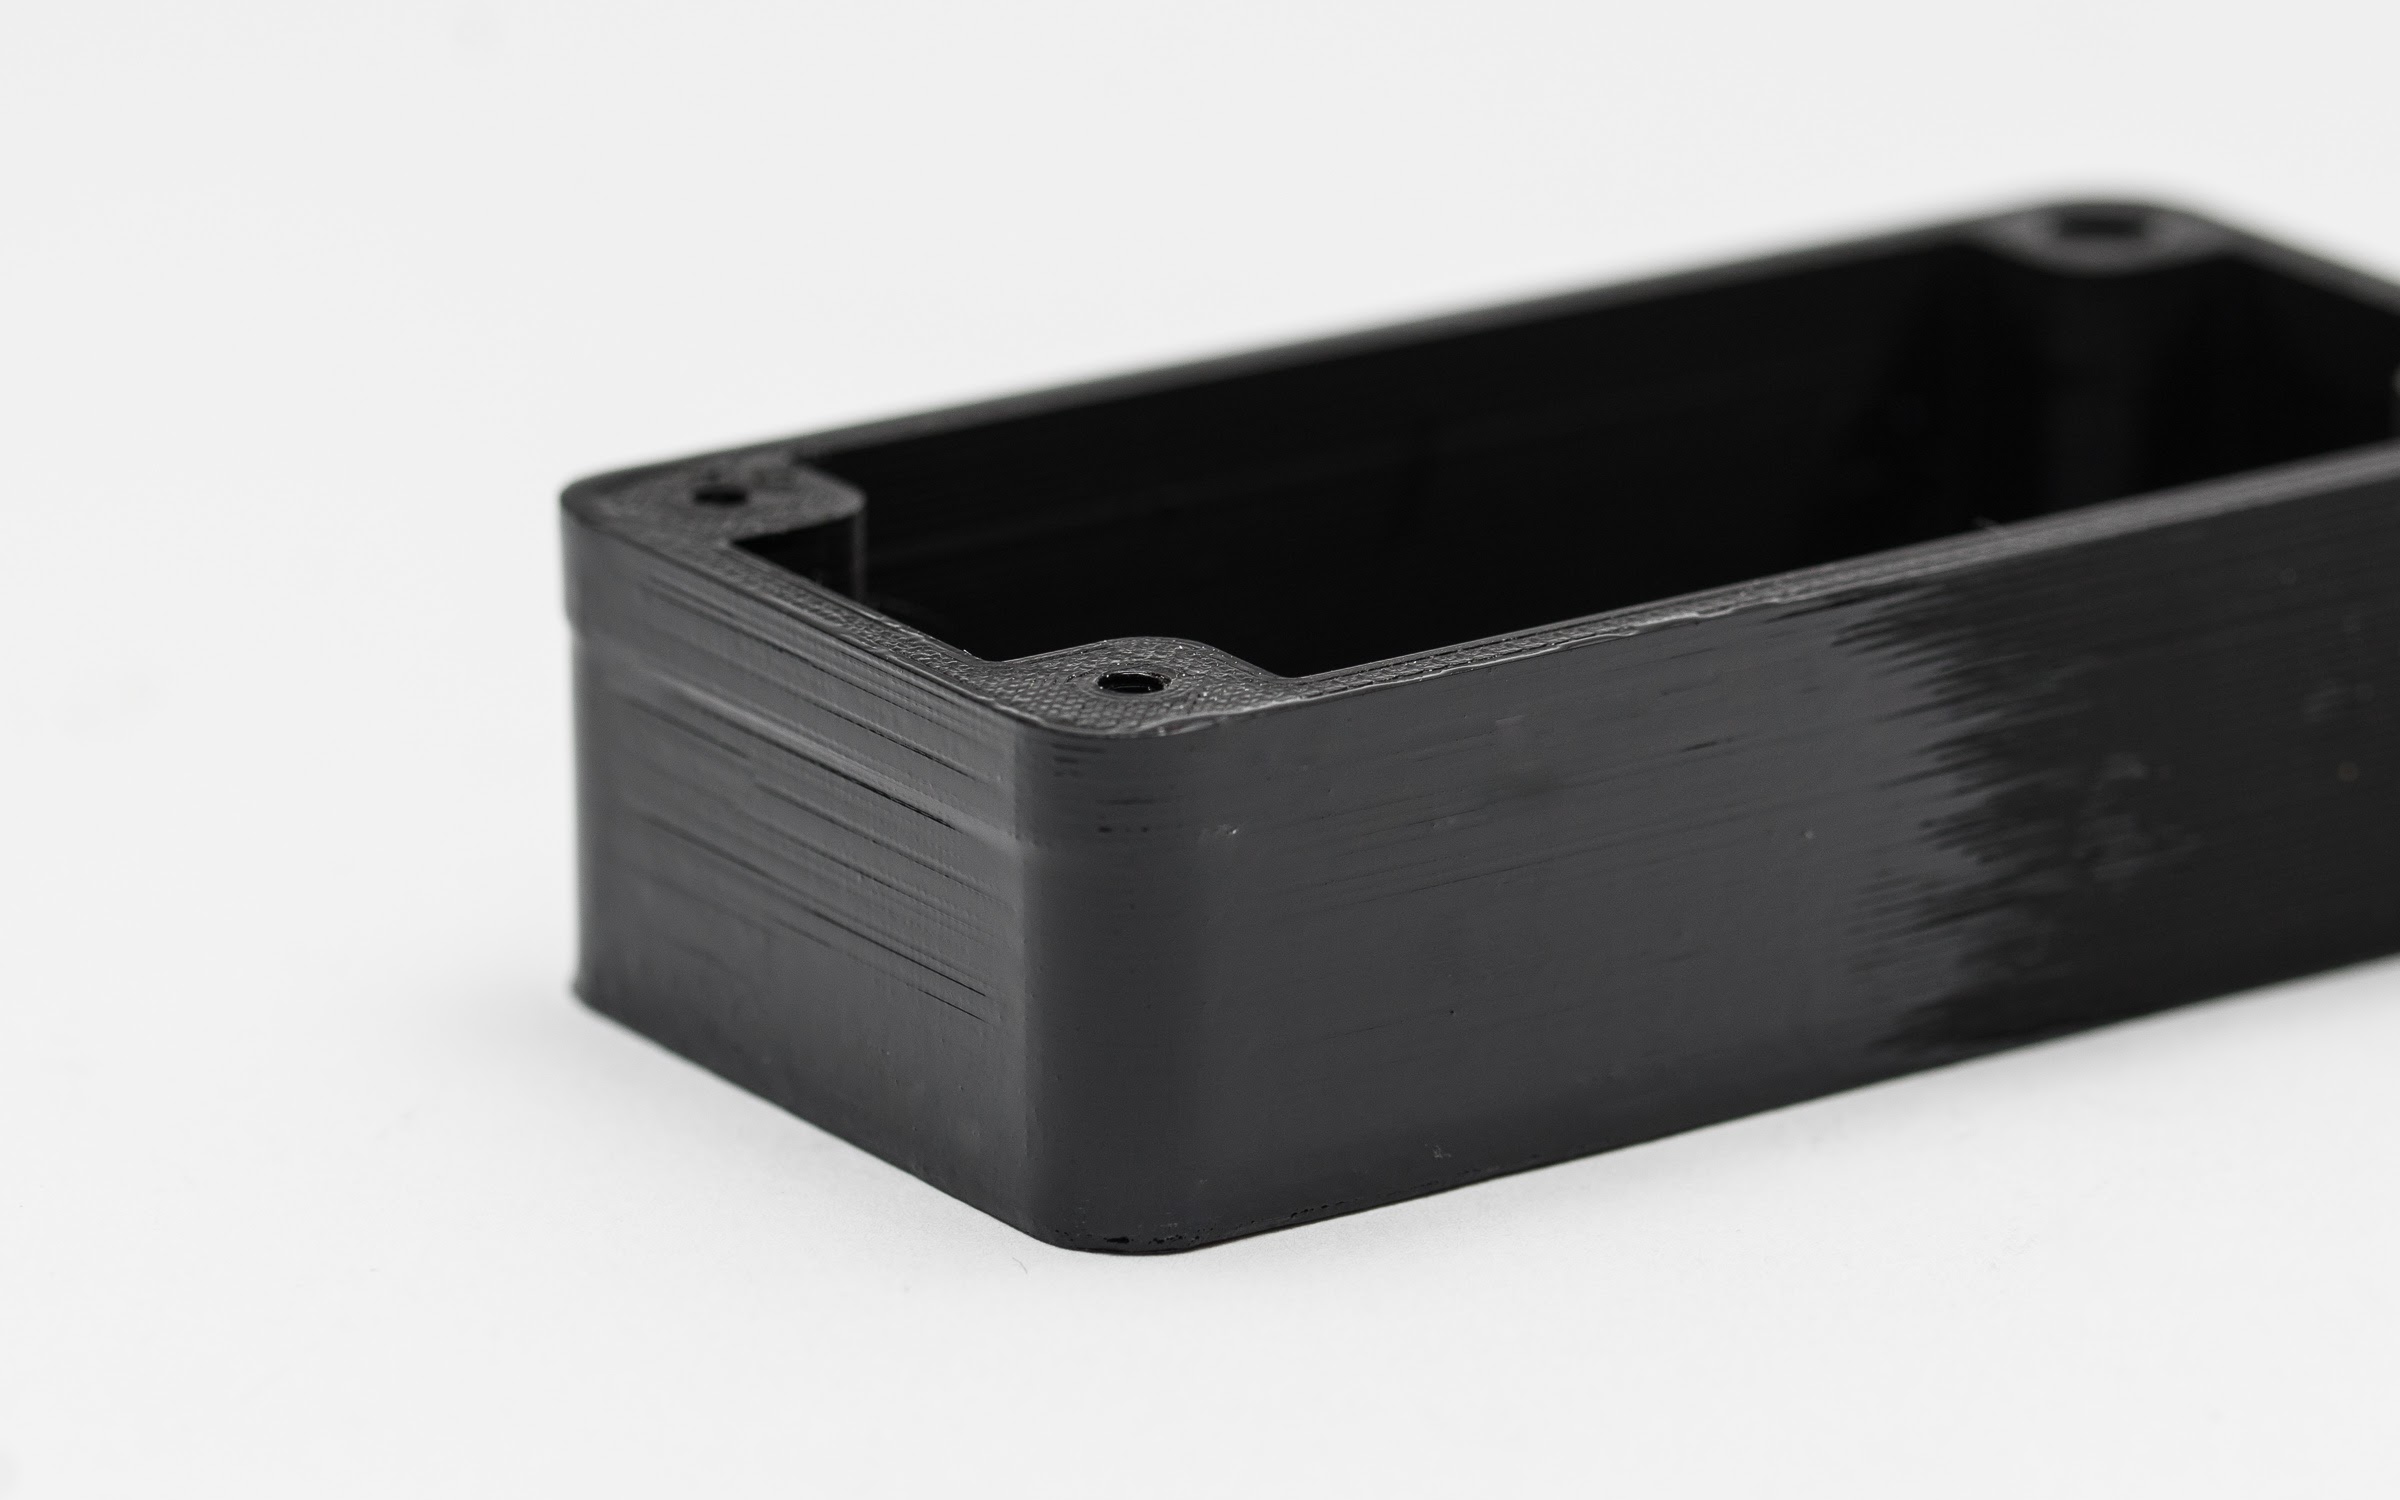
A nickel plated, FDM printed structural member coated by Repliform using RepliKote Technology.
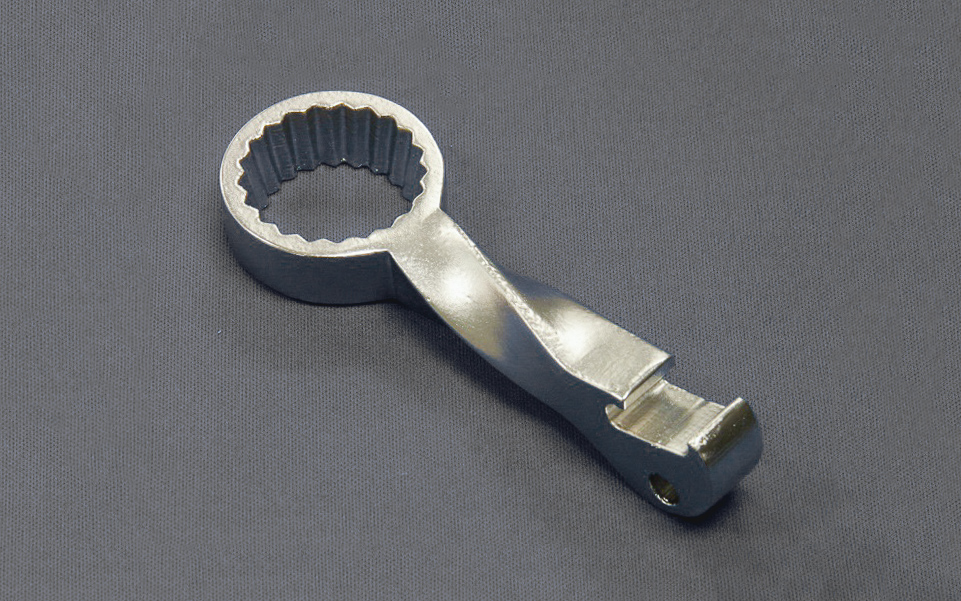
Process: Metal-plating can be done using electroplating at home, or a professional shop. Proper metal-plating requires a strong knowledge of materials, and what can be done at home is limited in comparison to what a professional shop can achieve. For superior finishes, and a wider range of plating options including chroming, utilizing a professional shop is the best option. For clarity, the process of electroplating with copper will be described below.
Electroplating at home can be done using copper or nickel as a base plate, to which other metals can then be plated over. It is of critical importance that the print surface is as smooth as possible prior to plating; any irregularities and layer lines will be emphasized after the plating process. Prepare the cleaned and sanded print for plating by coating the plastic with a thin layer of high-quality conductive paint, or a solution of acetone and graphite if the print is ABS. Allow the conductive coating to dry fully, and sand if necessary to ensure a smooth surface. It is of utmost importance to minimize contact with the print at this point or wear gloves, as the oils from skin will affect the plating process.
Insert the screw or eyehook into an inconspicuous surface of the print, and attach to one of the rectifier leads; this will serve as the cathode and must be connected to the negative terminal of the rectifier. Attach the copper anode to the positive terminal of the rectifier using the second power lead, and fill the chosen vessel with enough copper electroforming solution to fully cover the print and copper anode. Insert the anode into the bath and turn on the power rectifier. Once the rectifier is on, insert the print into the bath, ensuring it is not contacting the anode at any point (Be very careful at this step, as once the print is in the bath, the plating system is electrically live and any contact with the solution or anode/cathode can cause injury). Set the power rectifier to 1-3 volts, and allow plating to occur until the print is fully coated. The voltage can be increased to increase plating time, but do not exceed 5 volts. Simply power off the rectifier and remove the print once a satisfactory coating has been deposited and dry the print using microfiber towels. Coat the print with a metal lacquer once dry to protect from corrosion.
Pros
Cons
| Finish | ★ ★ ★ ★ ☆ |
| Tolerances | ★ ★ ★ ☆ ☆ |
| Speed | ★ ★ ★ ★ ☆ |
| Suitable for | All FDM thermoplastics |
Want to learn about electroless nickel plating? Here’s a guide to using the post-processing technique, how it works, its common industrial uses, and more.
Read article
Want to learn about media blasting? Here’s a guide to using the post-processing technique, how it works, its common industrial uses, and more.
Read article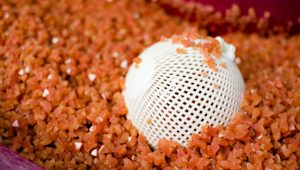
Find out about the range of surface finishes and materials that make for aesthetically pleasing custom parts.
Read article
Passivation is a chemical process used to enhance the corrosion resistance and durability of a metal. Find out how it works and when it’s a worthwhile addition to your custom parts.
Read article
Learn about the differences between Type II and Type III anodizing, their benefits, typical applications, and how to choose the ideal surface finish for your part.
Read article
Want to learn more about black oxide coating? In this article, we’ll take a look at black oxide as a surface finish, its history, common applications, and more
Read article
How do you add logos, lettering, serial numbers and other customized designs to your custom parts? Part marking is a cost-effective way to give parts those extra identifying and/or cosmetic details. Learn the common part marking techniques on the market today, including laser engraving and silk screening.
Read article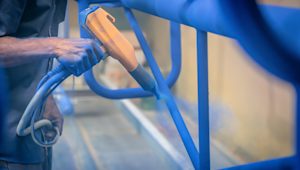
What is powder coating and in what cases should you select it as a finish for CNC-machined metal parts? This article covers the details of the powder coating process, as well as when to choose it for the best performance and quality.
Read article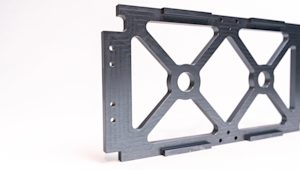
What is anodizing? Anodizing is key to finishing parts made from aluminum and other metals. Learn how anodizing works and why it is an important part of CNC machining and manufacturing.
Read article
What surface finishes are available for CNC machining? You can apply post-processing and surface finishes to improve the surface roughness, cosmetic properties and wear resistance of metal parts. Learn about the most common ways to finish CNC machined parts, and how to select the best methods for your applications.
Read article
A comprehensive guide describing the range of post-processing options for FDM printed parts
Read article
What are the post-processing methods and steps for SLS and MJF 3D printing? In this article, we explore the most common post-processing methods, including dyeing and metal plating.
Read article